Hole 5 at Westin Innisbrook Resort 'Copperhead Course'
- Par
- 5
- Yardage
- 605 yds
- Stroke index
- 1
- Hazards
- 6 bunkers · Water
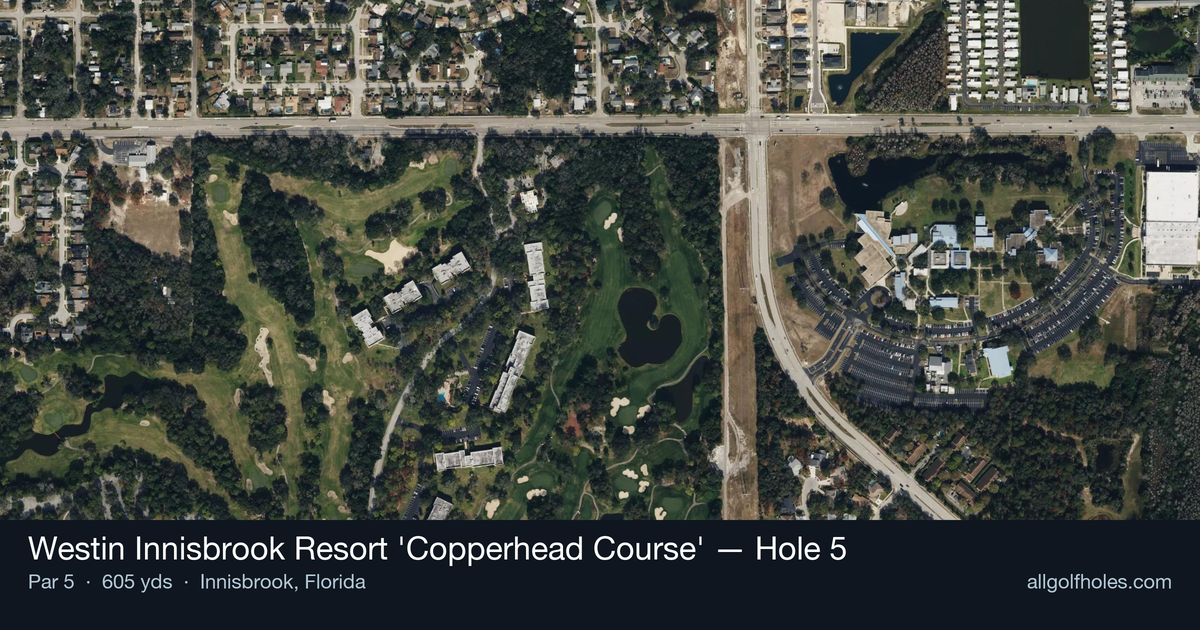
Aerial source not provided
Green size: 28 yds deep × 38 yds wide
Scorecard yardage is for Championship tees. The aerial shows its labeled reference position; distance rings measure to the green.
Championship tees · Par 5 · 605 yards
The plan for No. 5
The fifth hole at Westin Innisbrook Resort's Copperhead Course stands as the course's most demanding test, earning its number one handicap rating through sheer length and strategic complexity. This 605-yard par 5 challenges even the longest hitters with its relentless distance, forcing most players to embrace a three-shot strategy that prioritizes precision over power. The hole's straight layout might appear straightforward, but the small green complex becomes increasingly elusive as fatigue sets in during the round's middle stretch. Smart course management becomes paramount here, as aggressive attempts to reach in two often lead to trouble. What makes this hole memorable is how it rewards patience and punishes impatience, serving as a perfect example of how championship golf design can create drama through length and strategic positioning rather than flashy hazards.
Off the tee
Your opening shot sets the tone for the entire hole. Focus on finding the center-right portion of the fairway to set up the best angle for navigating the first dogleg. A controlled driver or strong 3-wood works well here, targeting the landing zone that provides the clearest view around the initial right bend. Avoid the temptation to cut too much corner early - the double-dogleg design means you'll have multiple opportunities to gain position, so patience on the tee shot pays dividends.
Approach & recovery
The approach strategy varies significantly based on whether you're playing this as a two-shot or three-shot hole. For most golfers, the second shot should focus on positioning for an optimal third shot angle. Navigate around the left bend while staying clear of the massive bunker on the left side. The key is reaching a position that allows you to approach the green from the best angle for the final right turn. When playing your approach to the green, remember the two-tiered design - short shots will roll back down, so err on the side of being slightly long rather than short.
On the green
The two-tiered green is the hole's final challenge. Study the pin position carefully, as shots to the wrong tier can leave you with extremely difficult putts or even chips back up to the correct level. The green's small size means precision is paramount - focus on getting your approach shot to the correct tier rather than going flag-hunting. When putting, pay special attention to the ridge between tiers, as putts crossing this feature can gain or lose significant speed. ## RISK VS REWARD This hole offers a classic risk/reward scenario for longer hitters who might attempt to reach in two. However, the double-dogleg design and strategically placed hazards make the aggressive play extremely risky. The smarter play for most golfers is accepting the three-shot approach, focusing on positioning each shot to set up the next. The reward for patient, strategic play often outweighs the potential benefits of aggressive tactics. ## DIFFERENT SKILL LEVELS **High Handicappers:** Embrace the three-shot strategy completely. Use irons or hybrids off the tee for accuracy, focus on staying in the fairway through each dogleg, and aim for the center of the green regardless of pin position. Your goal is avoiding big numbers on this challenging hole. **Low Handicappers:** While you may have the length to attempt reaching in two, carefully evaluate conditions and your lie before committing to the aggressive play. Often, a well-positioned wedge from the ideal distance will yield better scoring opportunities than a forced long iron from an awkward angle. Use your course management skills to navigate the doglegs efficiently while setting up scoring chances. The 5th hole rewards golfers who can balance ambition with smart strategy, making it a true championship test that separates good rounds from great ones.
Hole 5 Green Complex
Mapped green boundary
Green size: 4,311 sq ft
Course coverage
Tournament and creator videos about Westin Innisbrook Resort 'Copperhead Course' — shared course coverage, not hole-specific clips.
Tournament coverage
Valspar Championship highlights
Valspar Championship | Final Round Highlights
2025
How did Hole 5 play?
How did this hole play today?
Frequently asked questions
Yardage reference: Championship tees · 605 yards.
Can this par 5 be reached in two?
↓
At 605 yards, A true three-shot hole for most players. Position your layup to leave a comfortable wedge distance.
How difficult is hole 5?
↓
This hole is one of the tougher holes on the course for most golfers. Key challenges include: long par 5, water in play, heavily bunkered, small green.
How big is the green on hole 5?
↓
The green is small and requires precision. Expect challenging pin positions with limited room for error.
What's a good score on hole 5?
↓
This hole is a true three-shot hole where birdie requires execution. This longer par 5 demands patience. Two good shots set up the scoring opportunity.