Hole 12 at Wilshire Country Club
- Par
- 4
- Yardage
- 405 yds
- Stroke index
- 2
- Hazards
- 9 bunkers · Water
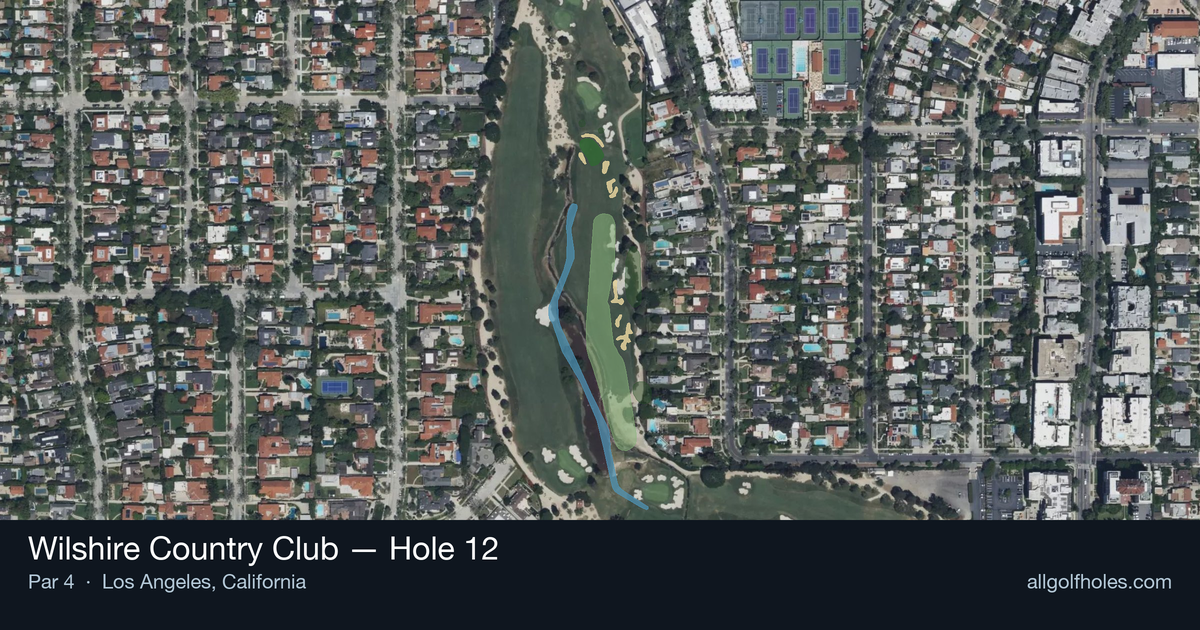
Aerial source not provided
Green size: 28 yds deep × 23 yds wide
Scorecard yardage is for Pro tees. The aerial shows its labeled reference position; distance rings measure to the green.
Pro tees · Par 4 · 405 yards
The plan for No. 12
The second-most challenging hole at Wilshire Country Club, this 405-yard par 4 demands precision from tee to green. The straight layout may appear straightforward, but don't be deceived—this hole's difficulty lies in its deceptive simplicity and unforgiving nature. A well-positioned tee shot down the center sets up the crucial approach to a small, demanding green complex that punishes anything less than a committed strike. With minimal hazards to distract, golfers must focus entirely on course management and execution. The compact putting surface requires pinpoint accuracy on the approach, making club selection and distance control paramount. This classic design exemplifies how strategic architecture can create challenge through subtlety rather than obvious obstacles, earning its status as one of Wilshire's most respected tests.
Off the tee
The key to this hole starts with a well-positioned drive that sets up your preferred approach yardage. Without hazards to dictate strategy, focus on finding the optimal distance for your most confident approach club. Most golfers should aim for the center-left portion of the fairway, leaving approximately 120-140 yards to the pin. Driver is often the right play here, but consider a fairway wood or long iron if you struggle with driver accuracy - the small green will punish any approach shot from an awkward lie or distance.
Approach & recovery
The small green size makes this approach shot all about precision. With no hazards to avoid, your primary concern is distance control and finding the correct section of the green relative to the pin position. A mid-iron to short iron (depending on your tee shot distance) should be struck with confidence, aiming for the center of the green when the pin is tucked. When the flag is accessible, you can be more aggressive, but remember that missing this small target will likely result in difficult up-and-down situations.
On the green
Small greens at courses like Wilshire typically feature subtle but important breaks that can fool golfers who don't read them carefully. Take extra time to analyze the slope from multiple angles, as the compact surface means even slight misreads can push putts well past the hole. Focus on lag putting to the correct level, as three-putting on a small green is particularly costly. Pay attention to grain direction, which can be more pronounced on smaller putting surfaces. ## RISK VS REWARD This hole's risk/reward equation is subtle but important. The temptation is to attack the pin on every approach shot since there are no obvious hazards, but the small green punishes overly aggressive play. The reward for finding the correct portion of the green is significant - you'll have legitimate birdie chances. The risk lies in short-siding yourself or missing the green entirely, leading to challenging recovery shots and potential bogeys or worse. ## DIFFERENT SKILL LEVELS **Low Handicappers:** Should view this as a scoring opportunity, using driver confidently and attacking pins when positioned favorably. Focus on precise yardages and commit fully to your approach club selection. Consider the pin position when planning your tee shot - you may want to favor one side of the fairway for better approach angles. **High Handicappers:** Play conservatively to the center of both the fairway and green. Consider using a 3-wood or hybrid off the tee for improved accuracy, accepting a longer approach shot in exchange for better positioning. On the approach, aim for the heart of the green regardless of pin position, focusing on avoiding the short game challenges that come with missing small targets. Two-putt par is an excellent score here.
Watch for
- Course conditioning and mapped hazards may affect line selection; confirm from the aerial.
Hole 12 Green Complex
Mapped green boundary
Green size: 3,063 sq ft
How did Hole 12 play?
How did this hole play today?
Frequently asked questions
Yardage reference: Pro tees · 405 yards.
What's the best strategy off the tee?
↓
For this 405-yard par 4, most players will hit driver to set up a comfortable approach.
How difficult is hole 12?
↓
This hole is one of the tougher holes on the course for most golfers. Key challenges include: water in play, small green.
What hazards should I watch out for on hole 12?
↓
Key hazards include: water at 175.3 yards. Plan your shots to avoid these trouble spots.
How big is the green on hole 12?
↓
The green is small and requires precision. Expect challenging pin positions with limited room for error.