Hole 7 at TPC Craig Ranch
- Par
- 3
- Yardage
- 232 yds
- Stroke index
- 9
- Hazards
- 4 bunkers · Water
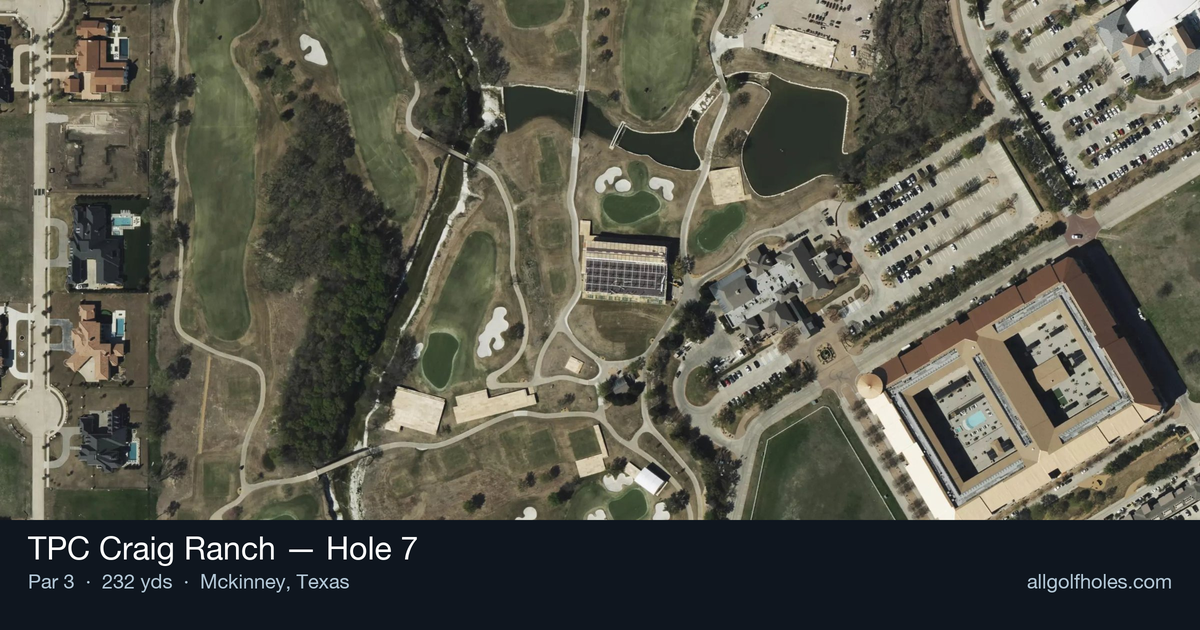
Aerial source not provided
Green size: 33 yds deep × 33 yds wide
Scorecard yardage is for Championship tees. The aerial shows its labeled reference position; distance rings measure to the green.
Championship tees · Par 3 · 232 yards
The plan for No. 7
TPC Craig Ranch hole 7 presents a deceptively challenging par 3 that demands precision over its 232 yards. This signature hole typically plays downwind, offering golfers the chance to attack the pin with confidence when the tee shot finds its mark. The key to conquering this straight-forward layout lies in avoiding the strategically placed fairway bunkers that guard the approach to the small green complex. While the hole may appear straightforward from the tee, the compact target requires careful club selection and committed execution. The absence of water hazards doesn't diminish the challenge – accuracy remains paramount on this well-designed test that exemplifies the championship-caliber golf that has earned TPC Craig Ranch admiration from touring professionals and world-ranked players alike.
Off the tee
With the prevailing downwind conditions, this hole often plays shorter than the posted yardage suggests. Club selection becomes critical - most players will be choosing between a mid-iron and long-iron depending on wind strength and pin position. The key insight from course knowledge is clear: avoiding the fairway bunkers allows you to attack this green more aggressively. Target the center of the green rather than chasing pins, especially when they're tucked behind bunkers. The downwind will add distance to your shot, so take at least one club less than the yardage would normally suggest. A smooth, controlled swing with a longer iron often produces better results than forcing a shorter club.
Approach & recovery
Since this is a par-3, your tee shot is your approach. Focus on landing the ball in the heart of the green and letting it release naturally with the wind. The small green size means there's little margin for error, making center-green strategy even more important. Pay attention to the pin position - when it's accessible, you can be slightly more aggressive, but when it's protected by bunkers or near the edges of the small green, play away from trouble. The wind assistance means you'll need to account for extra roll-out upon landing.
On the green
The small green at the seventh creates interesting putting dynamics. While shorter putts are more common due to the compact putting surface, the slopes and breaks can be more pronounced. Focus on speed control, as the smaller target means less room for error on both approach putts and comebacks. Study the green's subtle contours during your approach - what looks flat from the tee may have more movement than expected. Conservative putting to the fat part of the green, even if it means a longer first putt, often leads to better scoring than aggressive attempts at difficult pins. ## RISK VS REWARD The primary risk/reward decision comes with pin position and club selection. When the pin is accessible in the center portion of the green, the downwind conditions create a genuine birdie opportunity. However, when pins are tucked behind bunkers or near edges, the small green size makes the penalty for missing severe. The bunkers mentioned in course knowledge create the main strategic tension - playing away from them to the center of the green is always the percentage play, but aggressive players might try to challenge them for closer proximity to certain pin positions. ## DIFFERENT SKILL LEVELS **Higher Handicap Players:** Focus entirely on finding the green, preferably in the center. Take advantage of the downwind assistance by selecting a comfortable club that ensures solid contact. Avoid any temptation to chase pins - par is an excellent score here. **Lower Handicap Players:** Can be more aggressive with pin positions when conditions allow, but should still respect the small green and protective bunkering. Use the downwind conditions to potentially take one extra club and make a more controlled swing, focusing on spin and trajectory control for better proximity. **Course Management Tip:** Regardless of skill level, the downwind conditions make this hole more about precision than power. Trust the wind assistance, take less club than normal, and commit to smooth tempo for optimal results on this demanding par-3.
Watch for
- Course conditioning and mapped hazards may affect line selection; confirm from the aerial.
Hole 7 Green Complex
Mapped green boundary
Green size: 5,327 sq ft
Course coverage
Tournament and creator videos about TPC Craig Ranch — shared course coverage, not hole-specific clips.
Tournament coverage
CJ CUP Byron Nelson highlights
THE CJ CUP Byron Nelson | Final Round Highlights
2025
Featured by these creators
Creator videos about this course
YouTube creators who filmed or featured TPC Craig Ranch. · Stats as of Oct 12, 2026 · 5d ago
A new-look TPC Craig Ranch, LIV’s cost cutting, & U.S. Open qualifying starts | The Shotgun Start
How did Hole 7 play?
How did this hole play today?
Frequently asked questions
Yardage reference: Championship tees · 232 yards.
What club should I use on this par 3?
↓
At 232 yards, most golfers will need a fairway wood or hybrid to reach this green. Adjust for elevation, wind, and pin position.
How difficult is hole 7?
↓
This hole is one of the tougher holes on the course for most golfers. Key challenges include: long par 3, water in play, heavily bunkered.
How big is the green on hole 7?
↓
The green is medium-sized with moderate targets. Pay attention to pin placement when selecting your approach club.
Where is the best miss on hole 7?
↓
If you're going to miss the green, favor the right side. The left brings more trouble into play and makes recovery difficult.
What's a good score on hole 7?
↓
This hole is a challenging par where bogey is acceptable. This longer par 3 will test your long iron or hybrid game. Par is a good score.