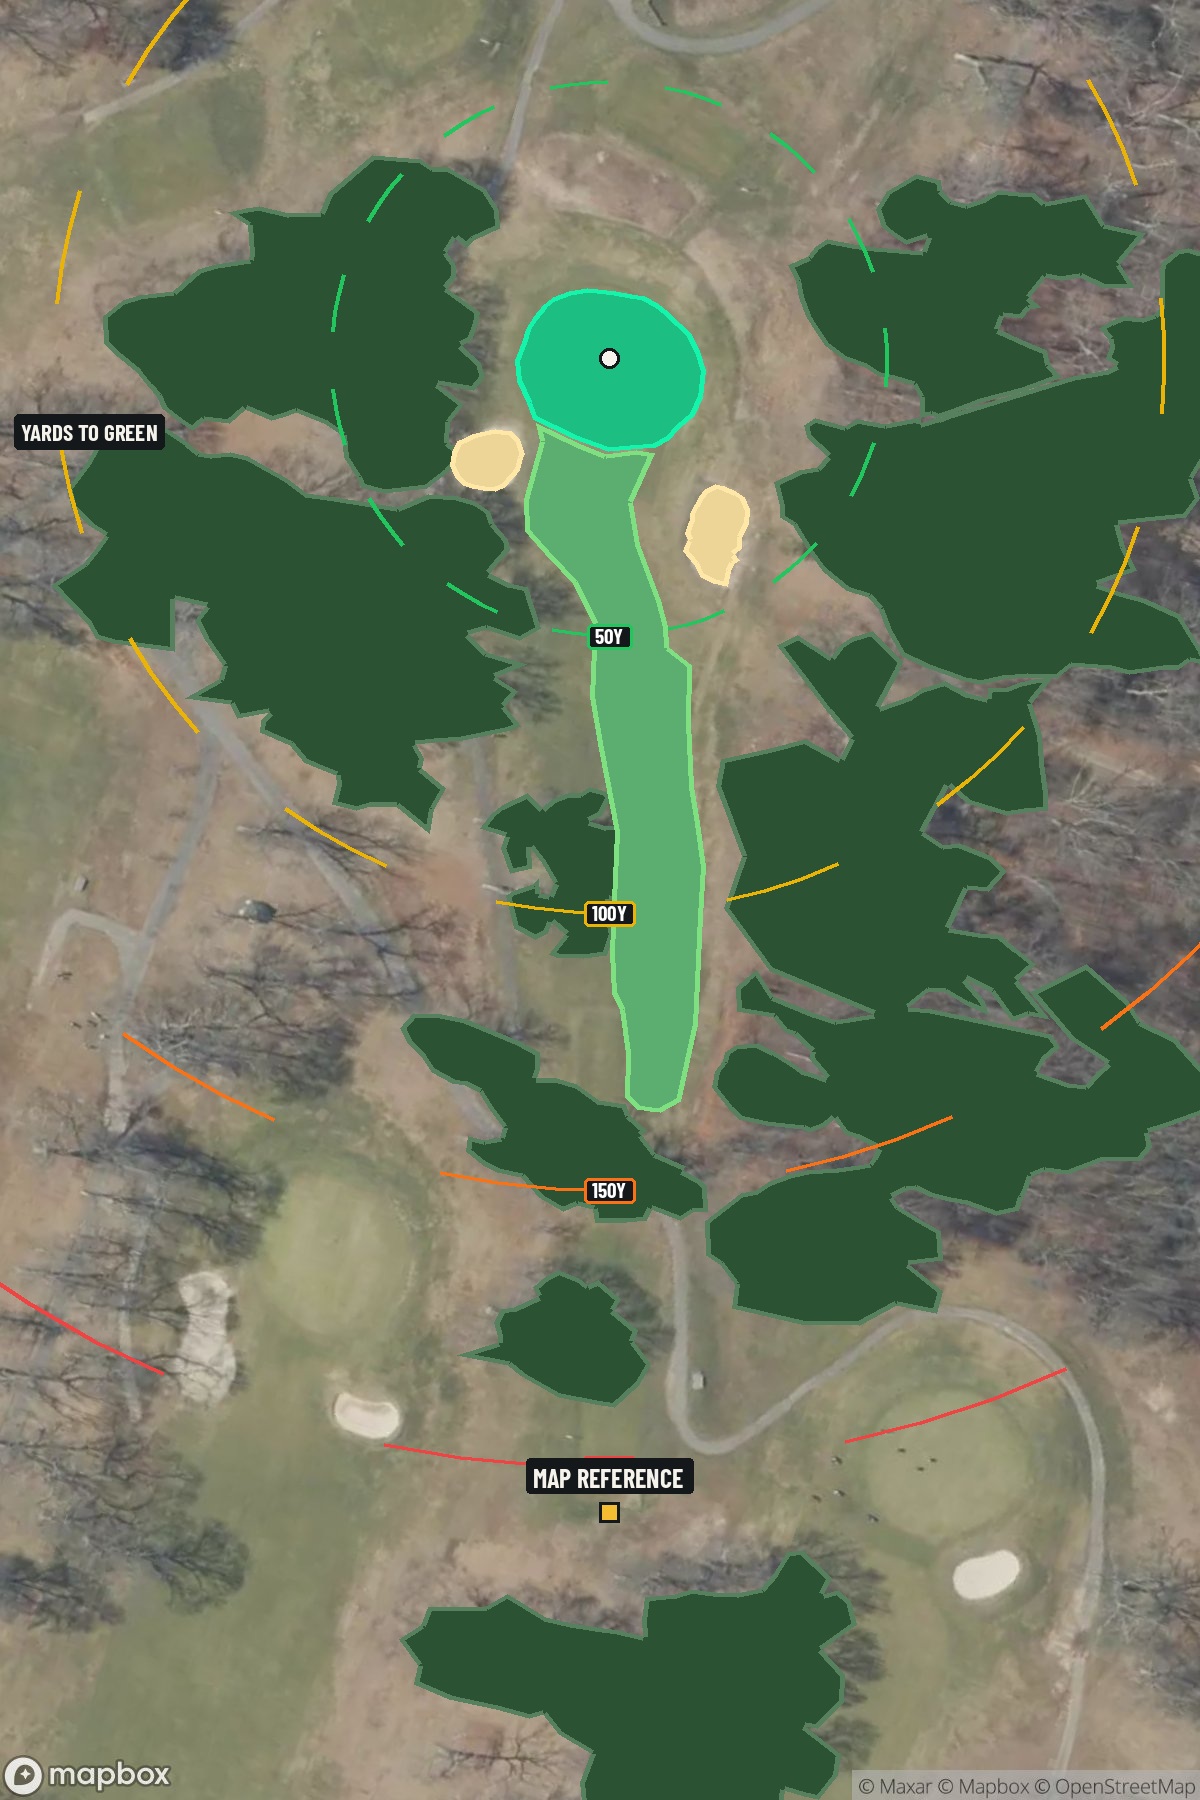
Hole 3 of 18 · Farmingdale, New York

Hole 3 at Bethpage State Park (Blue Course)

Par
3
Yards
195
Handicap
15
Bunkers
2
Hole 3 aerial at Bethpage State Park (Blue Course)
Map distances from Map reference tee

The map's printed distances are measured from the Map reference tee to the green; they do not move when you change tees. Your Championship yardage is in the tiles above.

Green size: 30 yds deep × 34 yds wide

Mapbox Satellite composite · capture date not provided. Green at the top.

Where this map comes from

Satellite photo
Date not published
Mapbox satellite
Green contours
2024 survey
USGS lidar survey
Report a map problem
100%
Hole 3 aerial at Bethpage State Park (Blue Course)

The plan for No. 3

These notes were written before the current map. Where their distances differ, trust the map.

The play: The third hole at Bethpage Blue exemplifies the architectural pedigree that defines this storied Long Island course. This mid-length par 3 demands precision over power, serving as an early test of iron play accuracy. Like all holes at Bethpage, it rewards thoughtful course management and punishes careless execution.

Shot by shot

  1. Off the tee

    Your tee shot strategy centers on solid club selection and unwavering commitment to your chosen target line. Given the 195-yard distance, most players will need a long iron or hybrid, though conditions and pin position will influence the final decision. The straight layout allows you to aim directly at your target without worrying about doglegs or forced carries. Focus on taking one more club than you think you need - coming up short on par 3s is a common scoring mistake. The small green demands accuracy, so prioritize a smooth, controlled swing over trying to muscle a shorter iron. Pick your target line based on pin position and commit fully to that decision.

  2. Approach & recovery

    Since this is a par 3, your tee shot is your approach shot. The key consideration is pin position relative to the small green's dimensions. When the flag is tucked toward edges, aim for the center of the green to ensure you find the putting surface. The unknown green shape adds an element of discovery, making course management even more critical. Wind conditions will significantly impact club selection on this length of shot. A two-club wind isn't uncommon, so factor in conditions and don't be afraid to take extra club when the breeze is against you. The straight hole layout means you won't need to shape shots around obstacles.

  3. On the green

    With a small green, you'll likely face relatively short putts if you find the putting surface. However, the compact target means precision in your approach shot directly translates to scoring opportunities. Study the green's subtle breaks during your pre-round preparation or while other players are hitting. The small green size suggests that lag putting may be less of a concern than on larger targets, but don't get careless with shorter putts. Take time to read the break and maintain your putting routine, especially since this early-round par 3 can set the tone for your entire round.

  4. Watch for

    • Greenside bunker (greenside)

The green on No. 3

Mapped boundary
Wide × deepyards
34×30
Areasq ft
6,240

Gear for Hole 3

We may earn a commission when you buy through these links.

Golfer feedback

How did Hole 3 play?

⚡ Quick Golfer Pulse

How did this hole play today?

1-tap anonymous vote

Frequently asked questions

Yardage reference: Championship tees · 195 yards.

What club should I use on this par 3?

↓

At 195 yards, most golfers will need a long iron or hybrid (5-iron to 6-iron) to reach this green. Adjust for elevation, wind, and pin position.

How difficult is hole 3?

↓

This hole is a good scoring opportunity for most golfers.

What hazards should I watch out for on hole 3?

↓

Key hazards include: 2 greenside bunkers. Plan your shots to avoid these trouble spots.

How big is the green on hole 3?

↓

The green is fairly large with multiple pin positions. Lag putting becomes important on longer putts.