Hole 7 at Liberty National Golf Course
- Par
- 4
- Yardage
- 484 yds
- Stroke index
- 3
- Hazards
- 6 bunkers · Water
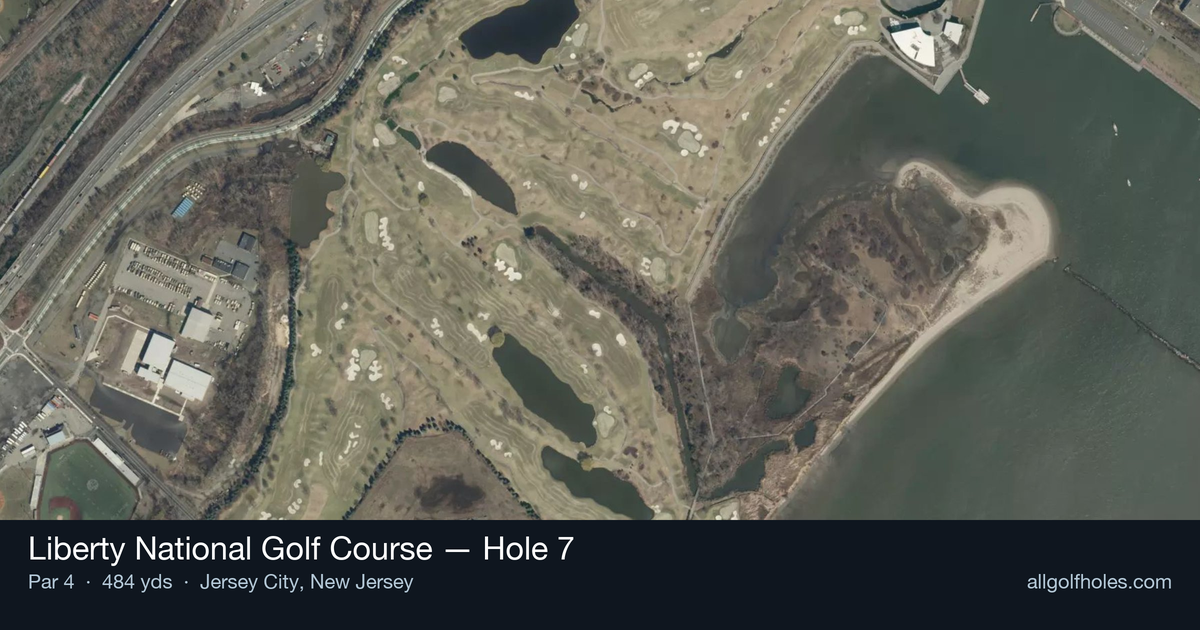
Aerial source not provided
Green size: 38 yds deep × 36 yds wide
Scorecard yardage is for Championship tees. The aerial shows its labeled reference position; distance rings measure to the green.
Championship tees · Par 4 · 484 yards
The plan for No. 7
The seventh hole at Liberty National forms part of the course's challenging "Amen Corner" stretch, featuring alongside holes 5 and 6 as one of the most demanding tests on this transformed industrial site. This strategic par 4 exemplifies the world-class design vision that shaped Liberty National's dramatic metamorphosis overlooking New York Harbor.
Off the tee
The downhill tee shot offers a tempting opportunity to let loose with driver, but restraint often proves more rewarding. A well-positioned fairway wood or long iron can provide the ideal angle for your approach while ensuring you stay in the short grass. The fairway's leftward tilt naturally guides balls in that direction, so aim slightly right of center to account for this slope. Focus on finding the fairway rather than maximizing distance - the blind nature of your second shot makes position far more valuable than an extra 20-30 yards. A controlled tee shot sets up a more manageable approach angle and gives you better visibility for club selection on your second shot.
Approach & recovery
The approach shot presents the hole's primary strategic challenge due to its blind nature caused by the sloping fairway. Club selection becomes critical as the small green offers little margin for error. Depending on your tee shot position, you'll likely face a mid-iron to long-iron approach that demands precision over power. Target the center of the green regardless of pin position - the small putting surface makes going for specific quadrants too risky. The runoffs surrounding the green create extremely difficult up-and-down opportunities, making it essential to find the putting surface. When in doubt between clubs, take the longer option to ensure you clear any front-edge trouble.
On the green
The small green at the 7th rewards conservative putting strategy. With runoffs on all sides creating challenging recovery shots, focus on leaving yourself below the hole whenever possible. Two-putt pars are excellent scores here, and attempting aggressive putts at difficult pin positions often leads to three-putts or worse. Pay attention to the green's subtle breaks and don't be fooled by the Manhattan skyline views - stay focused on reading the putting surface carefully. The compact nature of this green means even short putts can have significant break.
Watch for
- 2 water hazards along the hole
- Greenside bunker (greenside)
- Fairway bunker crossing the landing zone
Hole 7 Green Complex
Mapped green boundary
Green size: 5,670 sq ft
Course coverage
Tournament and creator videos about Liberty National Golf Course — shared course coverage, not hole-specific clips.
Featured by these creators
Creator videos about this course
YouTube creators who filmed or featured Liberty National Golf Course. · Stats as of Oct 12, 2026 · 6d ago
Victory at Liberty 🏆 Jeeno Thitikul wins the Mizuho Americas Open at Liberty National 🗽
How did Hole 7 play?
How did this hole play today?
Frequently asked questions
Yardage reference: Championship tees · 484 yards.
What's the best strategy off the tee?
↓
For this 484-yard par 4, most players will hit driver to set up a comfortable approach.
How difficult is hole 7?
↓
This hole is one of the tougher holes on the course for most golfers. Key challenges include: long par 4, water in play, heavily bunkered.
How big is the green on hole 7?
↓
The green is medium-sized with moderate targets. The green is deeper than wide, so club selection is crucial. Pay attention to pin placement when selecting your approach club.
Which side of the fairway is safer on hole 7?
↓
Aim for the right side of the fairway when possible. Missing left (water) brings more trouble into play.
What's a good score on hole 7?
↓
This hole is one of the tougher holes where par feels like birdie. A challenging par 4. Accept that bogey happens and avoid big numbers.