Hole 11 at Streamsong Resort (Red Course)
- Par
- 4
- Yardage
- 423 yds
- Stroke index
- 5
- Hazards
- 5 bunkers
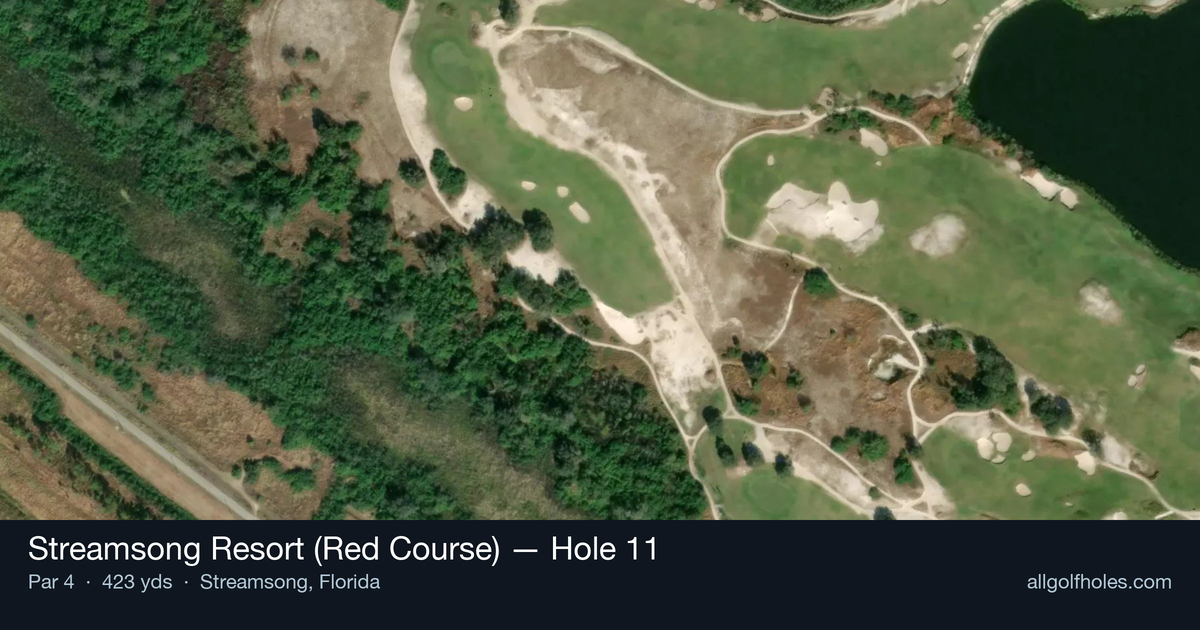
Aerial source not provided
Green size: 48 yds deep × 24 yds wide
Scorecard yardage is for Championship tees. The aerial shows its labeled reference position; distance rings measure to the green.
Championship tees · Par 4 · 423 yards
The plan for No. 11
The 11th hole at Streamsong Red marks a dramatic shift in character, becoming the first hole on Bill Coore and Ben Crenshaw's masterpiece to feature trees lining the fairway. This uphill par 4 demands a precise carry over a massive waste bunker, introducing golfers to a more traditional parkland feel within the resort's otherwise wild, sandy landscape.
Off the tee
The tee shot strategy centers on successfully navigating the uphill carry over the giant waste bunker while positioning yourself optimally for the approach. Driver is typically the right choice for most players to ensure adequate distance past the hazard and into the fairway's safe landing zone. The tree-lined corridor requires accuracy, so focus on a smooth, controlled swing rather than maximum distance. Target the center-right portion of the fairway to avoid the trees on both sides while setting up the best angle to the green. Players who struggle with accuracy should consider a 3-wood or hybrid to ensure they clear the waste bunker while maintaining better control. The uphill nature of the carry can make distances play longer than they appear, so don't underestimate the club selection needed.
Approach & recovery
With a small green as your target, precision trumps power on the approach shot. The green's compact size demands accurate club selection and committed execution. Depending on your tee shot placement, you'll typically face a mid-iron to short-iron approach. The green slopes significantly from right-to-left, feeding balls toward a large shaved collection area on the left side. This natural drainage creates both opportunity and danger - balls hit to the right portion of the green will naturally feed toward center pin positions, while anything pulled left risks running off into the collection area. Favor the right side of the green on your approach, allowing the slope to work in your favor rather than against you.
On the green
The right-to-left slope dominates putting strategy on this small green. Most putts will break toward the left side, with the severity depending on pin position and your ball's location. When the pin is positioned on the left side near the collection area, extreme caution is required - it's better to lag putt to the safe, right side of the hole rather than risk an aggressive putt that could run off the green. The compact nature of the green means distance control is crucial. Practice putting with a focus on speed rather than line, as the slope will often bring properly paced putts back toward the hole. From above the hole, putting becomes extremely challenging due to the downhill, left-breaking nature of most positions.
Watch for
- Greenside bunker (greenside)
- Fairway bunker crossing the landing zone
Hole 11 Green Complex
Mapped green boundary
Green size: 6,717 sq ft
How did Hole 11 play?
How did this hole play today?
Frequently asked questions
Yardage reference: Championship tees · 423 yards.
What's the best strategy off the tee?
↓
For this 423-yard par 4, most players will hit driver to set up a comfortable approach.
How difficult is hole 11?
↓
This hole is a moderate challenge for most golfers. Key challenges include: heavily bunkered.
How big is the green on hole 11?
↓
The green is fairly large with multiple pin positions. Lag putting becomes important on longer putts.