Hole 13 at Wilshire Country Club
- Par
- 3
- Yardage
- 188 yds
- Stroke index
- 16
- Hazards
- 4 bunkers
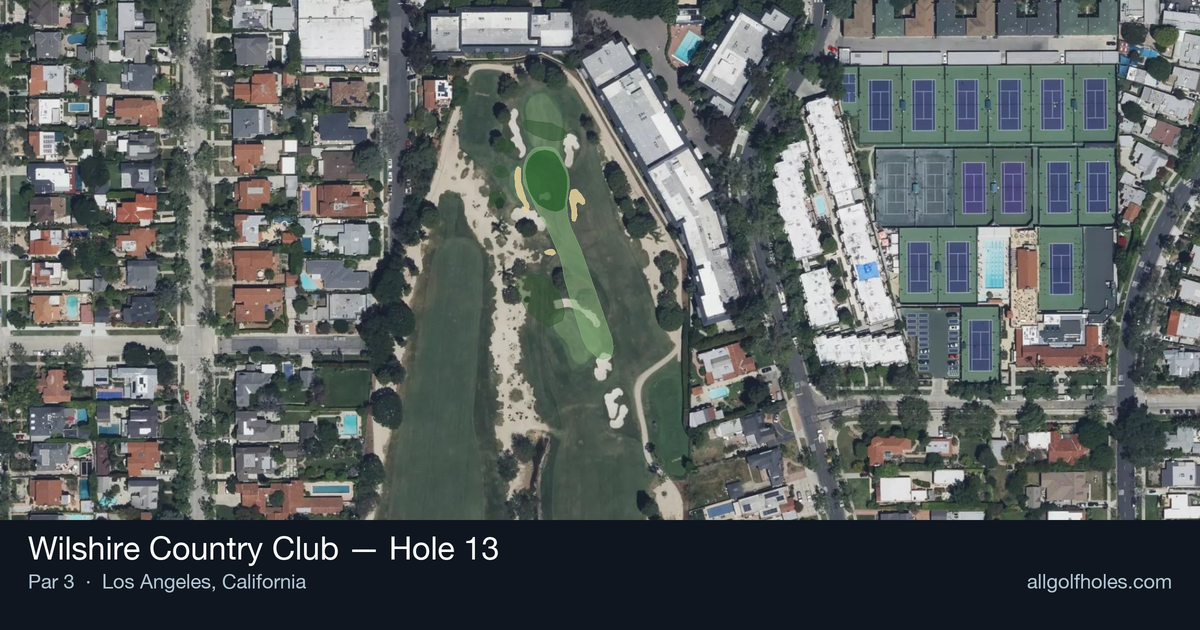
Aerial source not provided
Green size: 32 yds deep × 21 yds wide
Scorecard yardage is for Pro tees. The aerial shows its labeled reference position; distance rings measure to the green.
Pro tees · Par 3 · 188 yards
The plan for No. 13
At 188 yards, Wilshire Country Club hole 13 presents a deceptively straightforward par 3 that demands precision over power. This mid-length one-shotter features a small, well-protected green that punishes anything less than a committed approach. The straight-line design eliminates guesswork about direction, placing the entire focus on distance control and trajectory. Without significant hazards cluttering the landscape, golfers might be tempted to attack aggressively, but the compact green complex rewards conservative play to the center. The hole's 16 handicap ranking reflects its accessible nature for most players, yet the small target ensures that even accomplished golfers must execute with care to secure a comfortable birdie opportunity.
Off the tee
**Club Selection**: The 188-yard distance typically calls for a mid-iron to long-iron depending on conditions. Factor in wind, pin position, and green firmness when making your selection. Most players will be looking at a 6-iron through 4-iron range. **Target Line**: Aim for the center of the green as your default strategy. With a small green, precision is paramount - there's little room for error even without major hazards. Focus on a smooth, controlled swing rather than trying to overpower the shot. **Execution Keys**: Take one extra club and swing at 80% to ensure solid contact and distance control. The lack of significant trouble means you can be aggressive with your line while maintaining conservative distance management.
Approach & recovery
Since this is a par 3, the tee shot IS the approach shot. The strategy centers on green entry angle and spin control: **Pin Position Awareness**: When the pin is tucked, aim for the fat part of the green and let your putting handle the scoring. When the pin is accessible, you can be more aggressive with your target. **Ball Flight Considerations**: A higher ball flight will help hold the small green, especially if conditions are firm. Consider this when choosing between clubs - sometimes a softer 5-iron is better than a hard 6-iron.
On the green
**Reading the Surface**: Small greens typically feature subtle but significant slopes. Spend time on the practice green before your round to understand how putts break at Wilshire's elevation and grass type. **Lag Putting Strategy**: With a small green, most putts will be makeable length. Focus on speed control to ensure any misses finish close to the hole. **Pin Position Strategy**: Front pins allow for more aggressive approaches, while back pins may require playing to the center and putting uphill. ## RISK VS REWARD **Conservative Play**: Aim for the center of the green regardless of pin position. This virtually guarantees a two-putt par and leaves birdie opportunities. **Aggressive Play**: Attack pins when they're accessible, particularly front and middle positions. The lack of major hazards means the penalty for missing is typically just a longer putt or short chip. **Conditions Factor**: In windy conditions, the conservative approach becomes even more valuable. Better to be putting from 30 feet than chipping from off the green. ## DIFFERENT SKILL LEVELS **High Handicappers**: - Take enough club to comfortably reach the green - Aim for the center regardless of pin position - Focus on making solid contact over trying to work the ball - Accept par as a good score and don't force birdie attempts **Low Handicappers**: - Use precise yardages and factor in all conditions - Attack accessible pins while respecting tucked positions - Utilize course knowledge about green speeds and subtle breaks - View this as a birdie hole that can offset bogeys elsewhere **Course Management Tip**: As the 16th handicap hole, this represents a scoring opportunity for players of all skill levels. The key is avoiding the mental trap of thinking "easy" holes are automatic - maintain focus and execute your normal pre-shot routine.
Watch for
- Course conditioning and mapped hazards may affect line selection; confirm from the aerial.
Hole 13 Green Complex
Mapped green boundary
Green size: 3,698 sq ft
How did Hole 13 play?
How did this hole play today?
Frequently asked questions
Yardage reference: Pro tees · 188 yards.
What club should I use on this par 3?
↓
At 188 yards, most golfers will need a long iron or hybrid (5-iron to 6-iron) to reach this green. Adjust for elevation, wind, and pin position.
How difficult is hole 13?
↓
This hole is a moderate challenge for most golfers. Key challenges include: small green.
How big is the green on hole 13?
↓
The green is small and requires precision. The green is deeper than wide, so club selection is crucial. Expect challenging pin positions with limited room for error.