Hole 9 at PGA West (Nicklaus Tournament course)
- Par
- 4
- Yardage
- 461 yds
- Stroke index
- 1
- Hazards
- 4 bunkers · Water
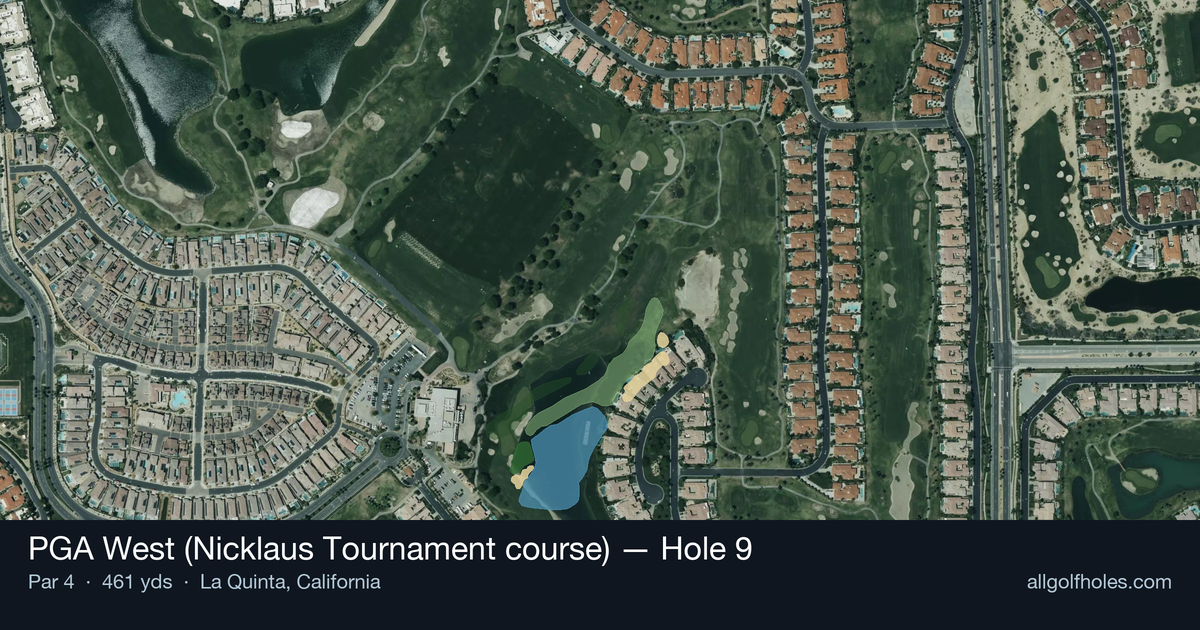
Aerial source not provided
Green size: 50 yds deep × 31 yds wide
Scorecard yardage is for Championship tees. The aerial shows its labeled reference position; distance rings measure to the green.
Championship tees · Par 4 · 461 yards
The plan for No. 9
The finishing hole of the front nine at PGA West's Nicklaus Tournament course commands respect as the number one handicap hole. This demanding 461-yard par 4 presents a deceptively straightforward challenge that has humbled countless golfers over the years. The straight layout requires precision from tee to green, with no room for error on either shot. A well-struck drive sets up a crucial approach to a small, unforgiving green that demands pinpoint accuracy. Without significant hazards to distract, this hole's difficulty lies in its demand for two quality shots under pressure. The compact putting surface punishes anything but the most precise approach shots, making par a genuine achievement on this formidable test that perfectly caps the outward nine.
Off the tee
The key to conquering this hole starts with an aggressive but controlled tee shot. With 461 yards to cover and a small green awaiting, you'll want to maximize distance while maintaining accuracy down the center of the fairway. The straight layout rewards bold driving - this isn't the time for conservative play with a 3-wood or hybrid unless conditions are particularly challenging. Focus on a target line down the middle of the fairway, allowing for your natural ball flight. The lack of significant hazards means you can commit fully to your swing without fear of major penalty shots. However, accuracy remains crucial as missing the fairway will leave you with a more difficult approach angle and lie for your second shot.
Approach & recovery
Your approach shot strategy will largely depend on the success of your drive. Even with a good tee shot, you'll likely face a mid to long-iron approach to a small green that demands precision. The compact target requires you to commit to your club selection and swing with confidence. Since the green shape is unknown, play to the center of the green unless you have a clear view of the pin position. The small size means there's little margin for error - focus on solid contact and proper distance control rather than trying to attack tucked pins. A shot that finds the green, even 20-30 feet from the hole, represents a successful approach on this challenging par 4.
On the green
With a small green, putting strategy becomes crucial for salvaging par or capitalizing on a well-executed approach. Expect subtle breaks and firm conditions typical of desert golf. Take time to read the green carefully, as the compact surface means even small misjudgments in speed or line can result in lengthy comeback putts. Position yourself below the hole when possible, as uphill putts on small greens are generally more manageable than downhill attempts. If you've hit your approach shot to the correct tier of the green, focus on lag putting to ensure a comfortable two-putt and move on to the back nine with momentum. ## RISK VS REWARD This hole offers limited risk/reward opportunities in the traditional sense, but the reward comes from aggressive, committed play. The risk lies in playing too conservatively - laying back off the tee or being tentative with your approach will leave you with longer, more difficult shots to a small target. The reward for bold play is significant: a well-struck drive followed by a confident approach can set up genuine birdie opportunities. However, the penalty for missed execution is equally significant, as recovery shots to such a small green become increasingly difficult. ## DIFFERENT SKILL LEVELS **Low Handicap Players:** Attack this hole aggressively. Use your longest, most accurate tee shot and follow with a committed approach to the green center. Your short game skills should allow you to get up and down even from greenside misses, making aggressive play the optimal strategy. **Mid Handicap Players:** Focus on two solid, straight shots rather than trying to overpower the hole. A good drive followed by whatever club gets you to the green gives you the best chance for par. Don't be afraid to take one more club on your approach to ensure you reach the putting surface. **High Handicap Players:** Course management is key here. If driver isn't your most reliable club, consider a 3-wood or hybrid that you can hit straight. For your approach, prioritize getting the ball somewhere on or around the green rather than trying to get close to difficult pin positions. A bogey here isn't a disaster given the hole's difficulty rating. This hole rewards confident, committed golf while punishing indecision and poor execution. Trust your preparation, commit to your shots, and remember that even the pros find this a challenging way to finish the front nine at PGA West.
Watch for
- Course conditioning and mapped hazards may affect line selection; confirm from the aerial.
Hole 9 Green Complex
Mapped green boundary
Green size: 7,147 sq ft
How did Hole 9 play?
How did this hole play today?
Frequently asked questions
Yardage reference: Championship tees · 461 yards.
What's the best strategy off the tee?
↓
For this 461-yard par 4, most players will hit driver to set up a comfortable approach.
How difficult is hole 9?
↓
This hole is one of the tougher holes on the course for most golfers. Key challenges include: long par 4, water in play, large green requiring good lag putting.
What hazards should I watch out for on hole 9?
↓
Key hazards include: water at 432.3 yards. Plan your shots to avoid these trouble spots.
How big is the green on hole 9?
↓
The green is fairly large with multiple pin positions. The green is deeper than wide, so club selection is crucial. Lag putting becomes important on longer putts.
What's a good score on hole 9?
↓
This hole is one of the tougher holes where par feels like birdie. A challenging par 4. Accept that bogey happens and avoid big numbers.