Hole 6 at Links at Spanish Bay, The
- Par
- 4
- Yardage
- 400 yds
- Stroke index
- 11
- Hazards
- 9 bunkers
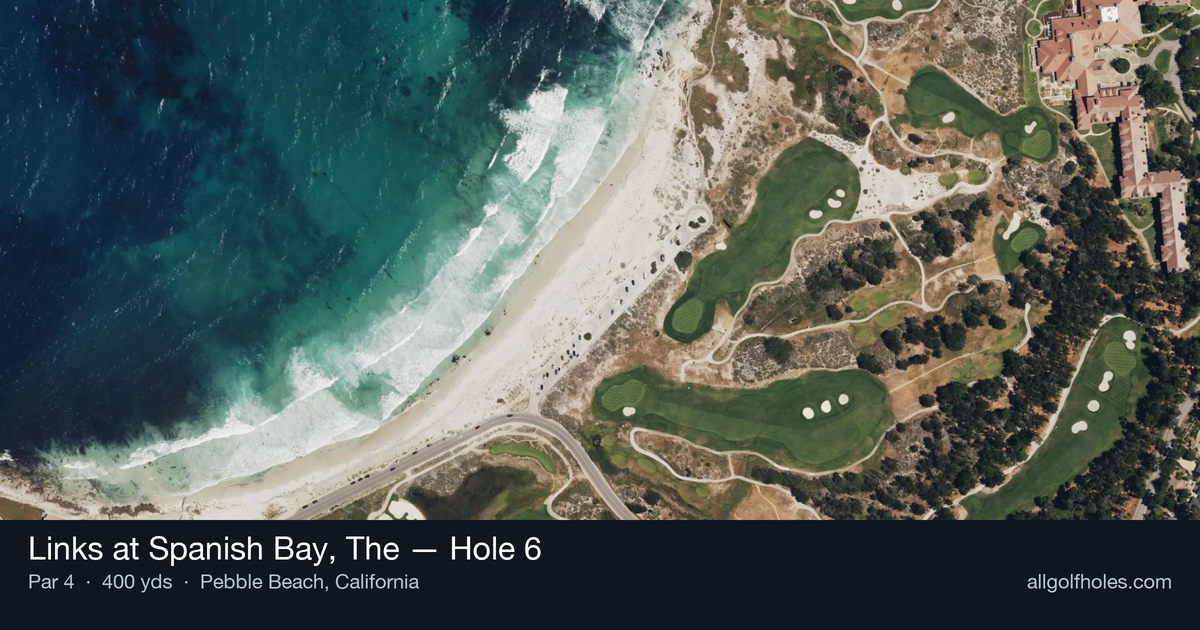
Aerial source not provided
Green size: 27 yds deep × 28 yds wide
Scorecard yardage is for Pro tees. The aerial shows its labeled reference position; distance rings measure to the green.
Pro tees · Par 4 · 400 yards
The plan for No. 6
The sixth hole at Links at Spanish Bay presents a deceptively challenging par 4 that epitomizes the course's strategic design philosophy. This straight 400-yard test demands precision over power, with the ever-present Monterey Peninsula winds adding complexity to club selection. The tee shot requires careful placement on a generous fairway that narrows toward the small, well-protected green. The approach shot becomes the critical moment, where the coastal breeze can transform a comfortable wedge into a demanding mid-iron. Players must resist the urge to attack the pin, instead focusing on the center of the compact green complex. With no significant hazards to intimidate, this hole rewards thoughtful course management and precise execution, making it a true links-style examination that separates strategic players from aggressive ones.
Off the tee
Your tee shot strategy should prioritize position over pure distance. With no significant hazards listed, the primary focus is finding the optimal angle for your approach shot. Aim for the center-left portion of the fairway to set up the best angle to the small green. A driver may be tempting, but consider a 3-wood or hybrid if wind conditions are strong - control trumps distance on this hole. The key is leaving yourself a comfortable approach distance while avoiding any fairway undulations that could create awkward lies.
Approach & recovery
This is where the hole's true character emerges. The small green size makes precision absolutely critical, and the coastal winds can wreak havoc on club selection. Heed the advice of experienced Spanish Bay players: club up significantly on approach shots. If you're considering one extra club, take two instead. The sea-level conditions and persistent winds make this essential for proper distance control. Target the center of the green regardless of pin position - the small target leaves little margin for error. A mid-iron to long-iron will typically be required depending on wind conditions and your tee shot position.
On the green
The small green creates challenging putting scenarios where lag putting becomes crucial. Focus on getting your first putt close rather than being overly aggressive with birdie attempts. The compact surface means most putts will have subtle breaks, but speed control is more important than reading dramatic slopes. Pay attention to wind direction even while putting, as strong coastal breezes can affect ball roll on longer putts.
Watch for
- Bunkers and waste areas influence line selection; use mapped hazard edges for the selected tee.
Hole 6 Green Complex
Mapped green boundary
Green size: 3,419 sq ft
Course and tournament history
Historical context for the course and venue. Each entry identifies the event or course it describes.
1974 · Tom Watson
Responding to player complaints from the 1974 U.S. Open, Tatum famously defended the U.S. Open course set-up, stating, “We had no intention of confounding the best players in the world. We just wanted
Source →
How did Hole 6 play?
How did this hole play today?
Frequently asked questions
Yardage reference: Pro tees · 400 yards.
What's the best strategy off the tee?
↓
For this 400-yard par 4, most players will hit driver to set up a comfortable approach.
How difficult is hole 6?
↓
This hole is a moderate challenge for most golfers. Key challenges include: heavily bunkered, small green.
How big is the green on hole 6?
↓
The green is small and requires precision. The green is deeper than wide, so club selection is crucial. Expect challenging pin positions with limited room for error.