Hole 7 at Aviara Golf Club at Four Seasons Resort
- Par
- 4
- Yardage
- 404 yds
- Stroke index
- 13
- Hazards
- 6 bunkers
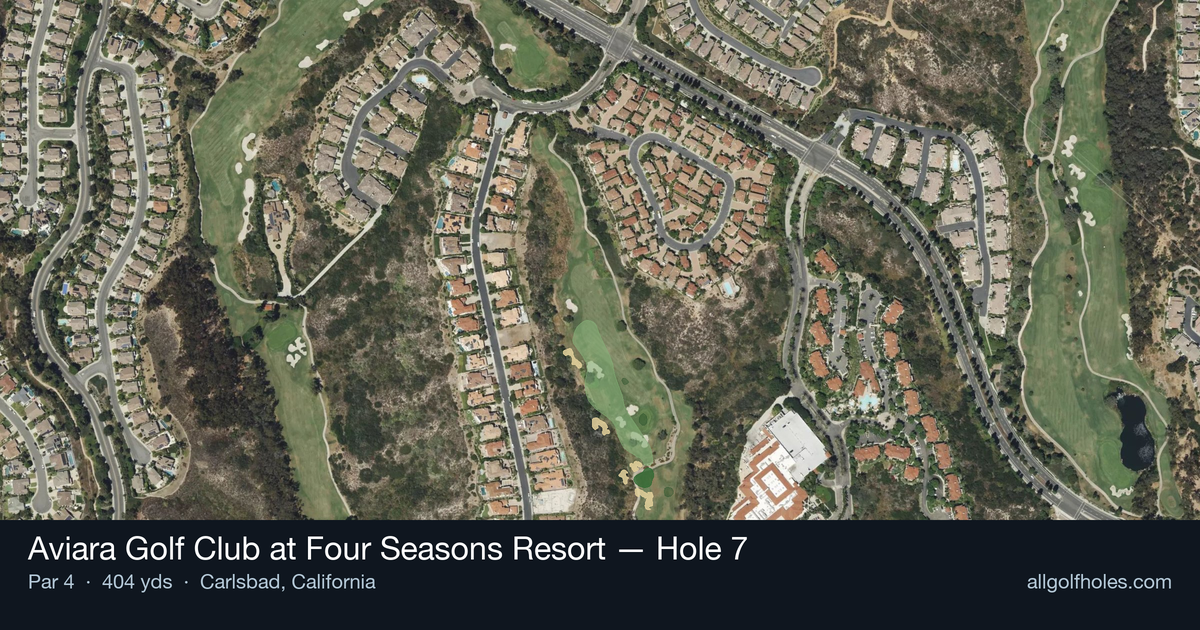
Aerial source not provided
Green size: 24 yds deep × 28 yds wide
Scorecard yardage is for Championship tees. The aerial shows its labeled reference position; distance rings measure to the green.
Championship tees · Par 4 · 404 yards
The plan for No. 7
The seventh hole at Aviara Golf Club at Four Seasons Resort presents a deceptively straightforward par 4 that demands precision over power. This 404-yard challenge features a generous fairway that invites an aggressive tee shot, but the real test lies in the approach to a small, well-protected green complex. With minimal hazards cluttering the landscape, golfers can focus on course management and shot execution rather than hazard avoidance. The straight layout allows players to see their target clearly from tee to green, yet the compact putting surface requires a controlled approach shot to avoid leaving difficult recovery shots. What makes this hole memorable is its pure golf design - no tricks or gimmicks, just solid strategic golf that rewards thoughtful play and punishes careless execution.
Off the tee
The straight layout allows you to take an aggressive line down the center of the fairway. With no major hazards lurking, focus on maximizing distance while maintaining control. Most players should consider driver or 3-wood depending on conditions and comfort level. The key is leaving yourself a manageable approach distance - ideally in the 100-150 yard range where you can attack the small green with confidence. Position your tee shot slightly left-center of the fairway if possible, as this often provides the best angle for approach shots on straight holes.
Approach & recovery
The small green is the defining feature of this hole and demands your full attention. Club selection is critical - err on the side of taking enough club to ensure you reach the putting surface, as short shots to small greens rarely result in easy up-and-downs. Focus on the center of the green unless the pin is clearly accessible. With no major hazards protecting the green, you can be more aggressive with your target line, but respect the size of the putting surface. A smooth, controlled swing with proper club selection beats trying to force a shot with less club.
On the green
Small greens typically feature subtle breaks that can be deceiving. Take extra time to read the entire putting surface, as the compact nature means putts can change direction more dramatically than expected. Focus on lag putting to the correct level of the green rather than being overly aggressive with birdie attempts. The small target area means approach shots may leave longer putts than anticipated, so solid two-putt strategy becomes essential for scoring. ## RISK VS REWARD This hole offers a clear risk/reward scenario: the absence of major hazards allows for aggressive play, but the small green punishes imprecision. The reward for two well-executed shots is a legitimate birdie opportunity, while poor execution can quickly lead to bogey or worse if you struggle around the small green. The key decision point comes with approach club selection - taking enough club to ensure you reach the green versus trying to dial in the perfect distance. ## DIFFERENT SKILL LEVELS **High-Handicap Players:** Focus on finding the fairway with your most reliable club off the tee, even if it means laying back with a 3-wood or hybrid. On the approach, prioritize hitting the green over getting close to the pin. Aim for the center of the green regardless of pin position and focus on two-putting for par. **Low-Handicap Players:** This hole rewards precision and allows for aggressive play. Consider driver to maximize birdie opportunities, then use the shorter approach to attack pin positions when they're accessible. The small green requires precise distance control, so dial in your yardages and commit to your club selection. This is a hole where good players should expect to make birdie with solid execution. The 13th handicap ranking suggests this hole plays easier than many others on the course, making it a key scoring opportunity that shouldn't be wasted through poor course management or tentative play.
Watch for
- Course conditioning and mapped hazards may affect line selection; confirm from the aerial.
Hole 7 Green Complex
Mapped green boundary
Green size: 3,513 sq ft
How did Hole 7 play?
How did this hole play today?
Frequently asked questions
Yardage reference: Championship tees · 404 yards.
What's the best strategy off the tee?
↓
For this 404-yard par 4, most players will hit driver to set up a comfortable approach.
How difficult is hole 7?
↓
This hole is a moderate challenge for most golfers. Key challenges include: small green.
How big is the green on hole 7?
↓
The green is small and requires precision. Expect challenging pin positions with limited room for error.