Hole 2 of 18 · Arlington, Texas
Hole 2 at Texas Rangers Golf Club
- Par
- 4
- Yards
- 448
- Handicap
- 11
- Bunkers
- 4
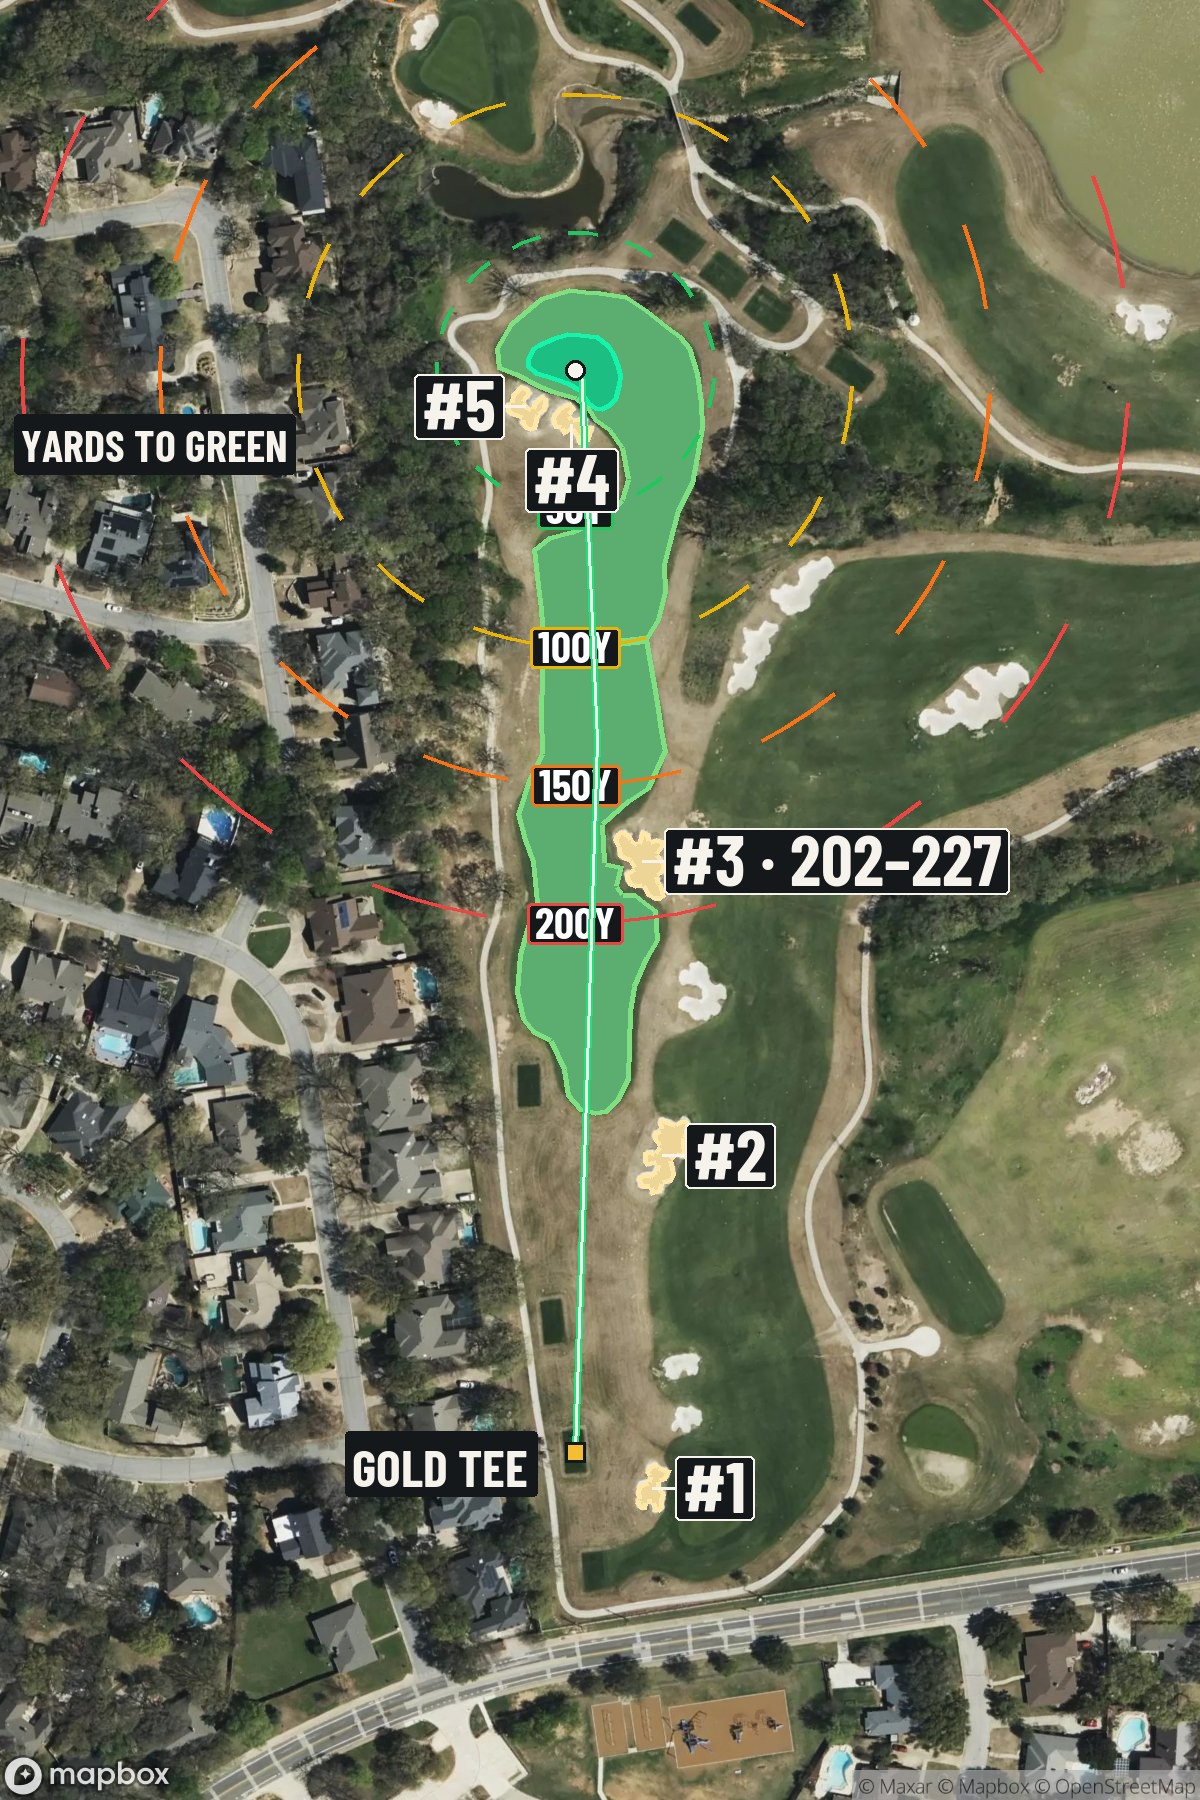
Map distances from Gold tee · 400 yds
The map's printed distances are measured from the Gold tee to the green; they do not move when you change tees. Your Black yardage is in the tiles above.
Green size: 28 yds deep × 35 yds wide
Mapbox Satellite composite · capture date not provided. Green at the top.
Where this map comes from
- Satellite photo
- Date not published
- Mapbox satellite
- Green contours
- 2019 survey
- USGS lidar survey
The plan for No. 2
The play: The right-side fairway bunker and the raised green approach make position more valuable than an unchecked long drive.
Shot by shot
The green on No. 2
Mapped boundary- Wide × deepyards
- 35×28
- Areasq ft
- 4,610
Golfer feedback
How did Hole 2 play?
⚡ Quick Golfer Pulse
1-tap anonymous voteHow did this hole play today?
Research notes
- The right-side fairway bunker and the raised green approach make position more valuable than an unchecked long drive. Choose a line that keeps the right fairway bunker out of your expected landing pattern. The fairway shaping tends to feed balls inward. Sand protects the front-left entrance. The bank on the right provides an alternative feeding angle when the lie and firmness support it. A central break divides the surface, with the architect describing movement toward the back-left. Check the actual pin and local putting slopes. (Official hole 2 architect diagram/commentary)[1]
Sources
- Texas Rangers official architect commentary: hole 2 — Texas Rangers Golf Clubhttps://www.texasrangersgolfclub.com/wp-content/uploads/sites/9836/2026/01/Hole-2web_80fd7c.png