Hole 11 of 18 · Tulsa, Oklahoma
Hole 11 at Southern Hills Country Club
- Par
- 3
- Yards
- 173
- Handicap
- 16
- Bunkers, water
- 4
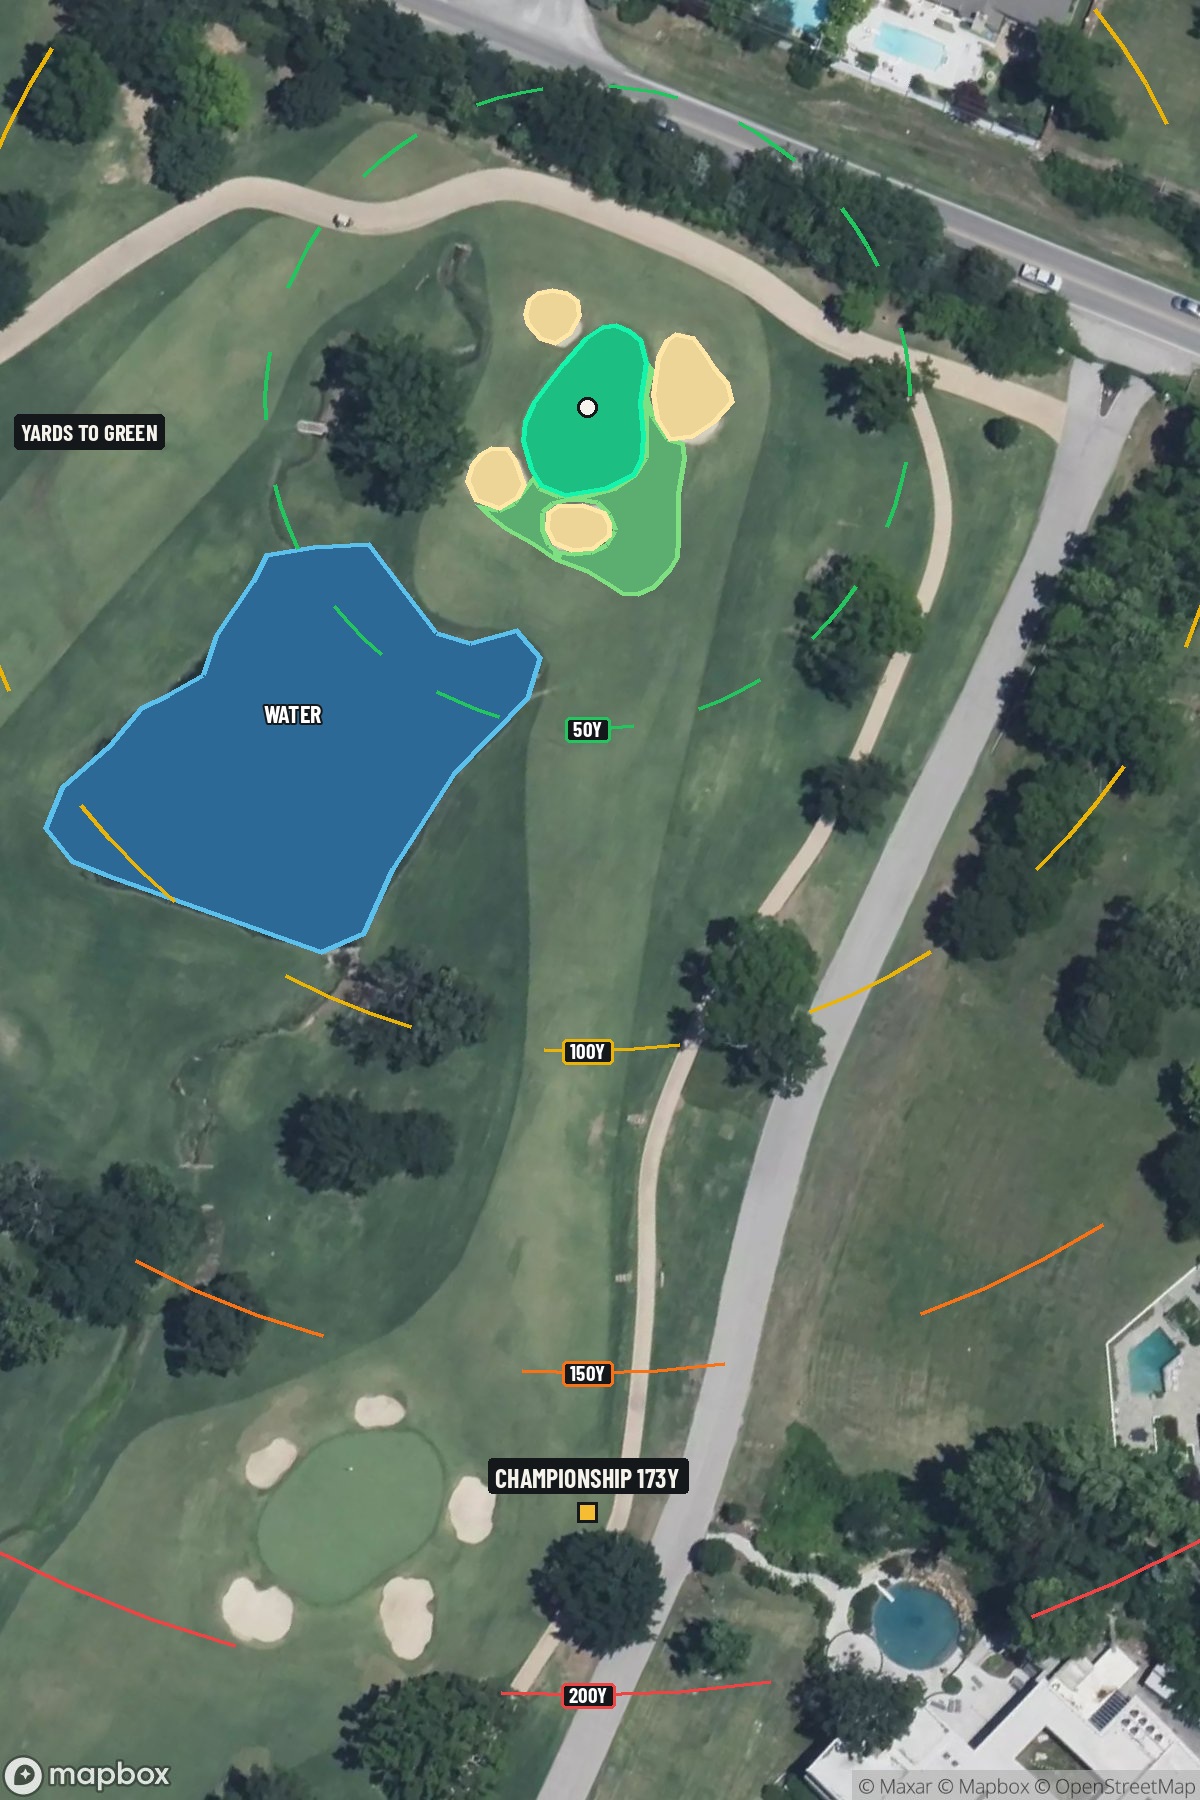
Map distances from Championship tee · 173 yds
The map's printed distances are measured from the Championship tee to the green; they do not move when you change tees.
Green size: 27 yds deep × 20 yds wide
Mapbox Satellite composite · capture date not provided. Green at the top.
Where this map comes from
- Satellite photo
- Date not published
- Mapbox satellite
- Green contours
- 2017 survey
- USGS lidar survey
The plan for No. 11
The play: The 11th hole at Southern Hills Country Club presents a deceptively challenging par 3 that embodies the course's reputation for precision golf. At 173 yards, this tee shot demands accuracy over a dramatic landscape featuring striking elevation changes that define Pete Dye's architectural brilliance. The small green sits as an inviting target, but the surrounding terrain tells a different story - with natural contours and strategic positioning that reward committed swings and punish indecision. What makes this hole memorable is how it seamlessly blends into Southern Hills' storied back nine, where the course truly reveals its championship character. Players must navigate not just the distance, but the visual intimidation that has challenged golfers on this historic Tulsa layout for decades.
Shot by shot
The green on No. 11
Mapped boundary- Wide × deepyards
- 20×27
- Areasq ft
- 2,945
Gear for Hole 11
Waterin play on this hole
Pack extra balls
 Titleist Pro V1$55 MSRPCheck priceCompare all picks →
4bunkers
Bring a sand wedge you trust
 Titleist Vokey SM10 Tour Chrome$180 MSRPCheck priceCompare all picks →
We may earn a commission when you buy through these links.
How did Hole 11 play?
How did this hole play today?
Frequently asked questions
Yardage reference: Championship tees · 173 yards.
What club should I use on this par 3?
↓
At 173 yards, most golfers will need a mid-iron (7-iron to 8-iron) to reach this green. Adjust for elevation, wind, and pin position.
How difficult is hole 11?
↓
This hole is one of the tougher holes on the course for most golfers. Key challenges include: water in play, heavily bunkered, small green.
What hazards should I watch out for on hole 11?
↓
Key hazards include: 4 greenside bunkers; water at 133.1 yards. Plan your shots to avoid these trouble spots.
How big is the green on hole 11?
↓
The green is small and requires precision. The green is wider than it is deep, rewarding shots that find the correct tier. Expect challenging pin positions with limited room for error.
What's a good score on hole 11?
↓
This hole is a solid par with birdie chances for precise approach shots. Making par is a good result here. Focus on hitting the green and avoiding three-putts.