Hole 11 at Muirfield Village Golf Club
- Par
- 5
- Yardage
- 588 yds
- Stroke index
- 10
- Hazards
- 3 bunkers · Water
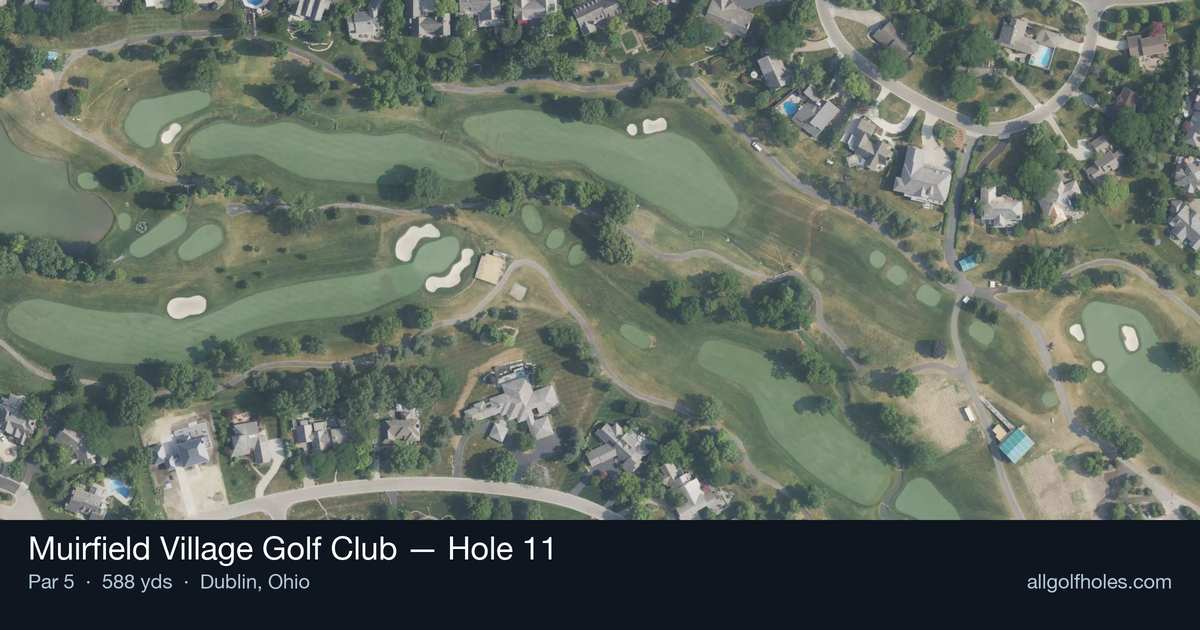
Aerial source not provided
Green size: 27 yds deep × 29 yds wide
Scorecard yardage is for Championship tees. The aerial shows its labeled reference position; distance rings measure to the green.
Championship tees · Par 5 · 588 yards
The plan for No. 11
The iconic 11th hole at Muirfield Village Golf Club stands as Jack Nicklaus's masterpiece of risk-reward architecture, stretching 588 yards through the heart of "Jack's Place." This signature par 5 embodies the Golden Bear's design philosophy, presenting a deceptively straightforward layout that entices aggressive play while punishing poor execution. The generous fairway invites confident tee shots, but the real drama unfolds on approach shots to the compact, elevated green complex. Players face critical decisions at every stage - whether to challenge the pin positions or play conservatively to the small target. This hole exemplifies why Muirfield Village has hosted the Memorial Tournament since 1976, demanding precision and course management that separates champions from contenders in PGA Tour competition.
Off the tee
The tee shot sets up everything on this hole, making target line selection crucial. Focus on finding the center of the fairway with your most reliable club - this isn't necessarily your driver. Many players benefit from hitting 3-wood or hybrid to ensure they stay in play and set up the ideal angle for their second shot. The straight layout means accuracy trumps distance, as being in the rough significantly complicates your approach options and limits your ability to attack the pin.
Approach & recovery
Your second shot strategy depends entirely on your tee shot execution and skill level. For longer hitters in good position, the decision becomes whether to go for the green in two or lay up to your favorite wedge distance. The small green makes going for it in two extremely risky unless you're hitting a mid-iron or shorter. Most players should focus on positioning their lay-up shot in the ideal scoring zone, typically leaving a full wedge shot of around 100-120 yards. This approach shot placement is critical - favor the side that gives you the best angle to the pin position.
On the green
The small green demands precision and proper speed control. Pin position significantly affects your approach strategy, as missing on the wrong side can leave difficult recovery shots. Focus on hitting the green first, then worry about getting close to the pin. The putting surface, while compact, can present subtle breaks that require careful reading. Take your time to study the slopes and commit to your line. ## RISK VS REWARD This hole epitomizes risk-reward golf architecture. The temptation to go for the green in two creates the primary strategic tension, but the small target makes this a low-percentage play for most golfers. The reward of a potential eagle or easy birdie must be weighed against the significant penalty for missing the green. Conservative play with a well-positioned lay-up typically yields better scoring results over time, but the hole's design makes aggressive play constantly tempting. ## DIFFERENT SKILL LEVELS **Low Handicap Players:** Can consider going for the green in two with a mid-iron or shorter, but should have a specific yardage and club in mind before attempting. Focus on course management and take the safe play when conditions or lie aren't optimal. **High Handicap Players:** Should play this as a three-shot hole, prioritizing position over distance. Use your most accurate club off the tee, lay up to a comfortable wedge distance, and focus on hitting the green with your third shot. Avoid the temptation to force aggressive shots that increase your risk of big numbers. **Mid Handicap Players:** The decision point players - assess each shot individually. If you're hitting 6-iron or shorter for your second shot and feeling confident, consider going for it. Otherwise, play strategically for a birdie opportunity with a well-positioned lay-up. The 11th hole at Muirfield Village rewards patience and punishes impatience. Trust your course management skills and remember that even the world's best players often choose the conservative route on this demanding par 5.
Hole 11 Green Complex
Mapped green boundary
Green size: 4,295 sq ft
Course and tournament history
Historical context for the course and venue. Each entry identifies the event or course it describes.
Jack Nicklaus
Muirfield Village was the brainchild of Jack Nicklaus, earning its nickname of "Jack's Place"
Source →
Course coverage
Tournament and creator videos about Muirfield Village Golf Club — shared course coverage, not hole-specific clips.
Tournament coverage
The Memorial Tournament highlights
the Memorial Tournament | Final Round Highlights
2025
How did Hole 11 play?
How did this hole play today?
Frequently asked questions
Yardage reference: Championship tees · 588 yards.
Can this par 5 be reached in two?
↓
At 588 yards, A true three-shot hole for most players. Position your layup to leave a comfortable wedge distance.
How difficult is hole 11?
↓
This hole is one of the tougher holes on the course for most golfers. Key challenges include: long par 5, water in play, small green.
How big is the green on hole 11?
↓
The green is small and requires precision. Expect challenging pin positions with limited room for error.
What's a good score on hole 11?
↓
This hole is a true three-shot hole where birdie requires execution. This longer par 5 demands patience. Two good shots set up the scoring opportunity.