Hole 4 at Liberty National Golf Course
- Par
- 3
- Yardage
- 193 yds
- Stroke index
- 13
- Hazards
- 3 bunkers · Water
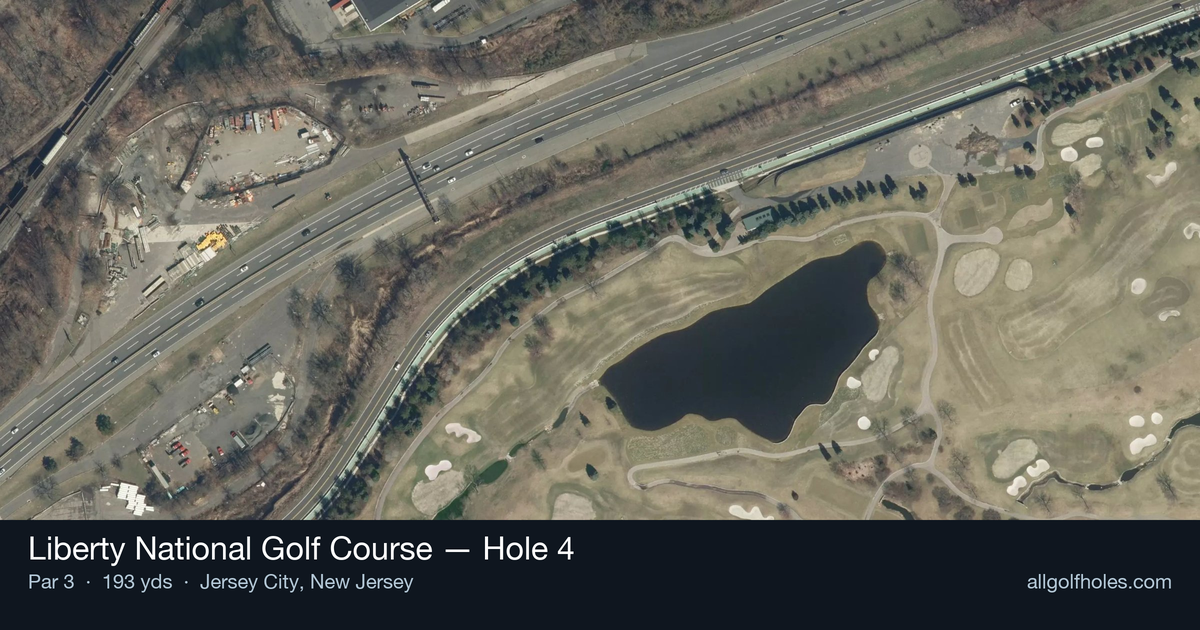
Aerial source not provided
Green size: 25 yds deep × 29 yds wide
Scorecard yardage is for Championship tees. The aerial shows its labeled reference position; distance rings measure to the green.
Championship tees · Par 3 · 193 yards
The plan for No. 4
The 4th hole at Liberty National serves as a memorable par 3 that showcases the course's stunning Manhattan skyline views, including glimpses of the Statue of Liberty. This challenging one-shotter demands precision with its well-protected green surrounded by strategic bunkering. Known for requiring a delicate approach shot, it exemplifies Liberty National's commitment to high-quality shot-making.
Off the tee
From the tee, you'll typically need a mid to long iron depending on wind conditions and pin position. The key is selecting enough club to carry any front protection while avoiding going long into trouble. Take one extra club and swing smoothly rather than forcing a shot - the small green demands precision over power. Aim for the center of the green unless you're confident in your distance control, as the putting surface offers limited margin for error.
Approach & recovery
Since this is a par 3, your tee shot IS your approach shot. Focus on a high, soft landing that will hold the small green. Pay close attention to wind direction, as the exposed location near the Hudson River can create swirling conditions. The green's compact size means even slight misses can leave challenging recovery shots, so commit fully to your club selection and target.
On the green
The putting surface features subtle undulations that can catch players off guard. Read putts carefully, as the small green can create deceptive breaks. Pin positions in the back portion of the green are particularly challenging, requiring precise distance control on approach shots. Focus on getting your first putt close rather than being overly aggressive, as three-putts can quickly turn a scoring opportunity into a bogey or worse.
Watch for
- 2 water hazards along the hole
- Greenside bunker (greenside)
Hole 4 Green Complex
Mapped green boundary
Green size: 2,963 sq ft
Course coverage
Tournament and creator videos about Liberty National Golf Course — shared course coverage, not hole-specific clips.
Featured by these creators
Creator videos about this course
YouTube creators who filmed or featured Liberty National Golf Course. · Stats as of Oct 12, 2026 · 5d ago
Victory at Liberty 🏆 Jeeno Thitikul wins the Mizuho Americas Open at Liberty National 🗽
How did Hole 4 play?
How did this hole play today?
Frequently asked questions
Yardage reference: Championship tees · 193 yards.
What club should I use on this par 3?
↓
At 193 yards, most golfers will need a long iron or hybrid (5-iron to 6-iron) to reach this green. Adjust for elevation, wind, and pin position.
How difficult is hole 4?
↓
This hole is one of the tougher holes on the course for most golfers. Key challenges include: water in play, small green.
What hazards should I watch out for on hole 4?
↓
Key hazards include: 3 greenside bunkers; water at 118.2 yards. Plan your shots to avoid these trouble spots.
How big is the green on hole 4?
↓
The green is small and requires precision. The green is deeper than wide, so club selection is crucial. Expect challenging pin positions with limited room for error.
Where is the best miss on hole 4?
↓
If you're going to miss the green, favor the right side. The left (water) brings more trouble into play and makes recovery difficult.