Hole 9 at Arcadia Bluffs Golf Club
- Par
- 3
- Yardage
- 203 yds
- Stroke index
- 11
- Hazards
- 1 bunker
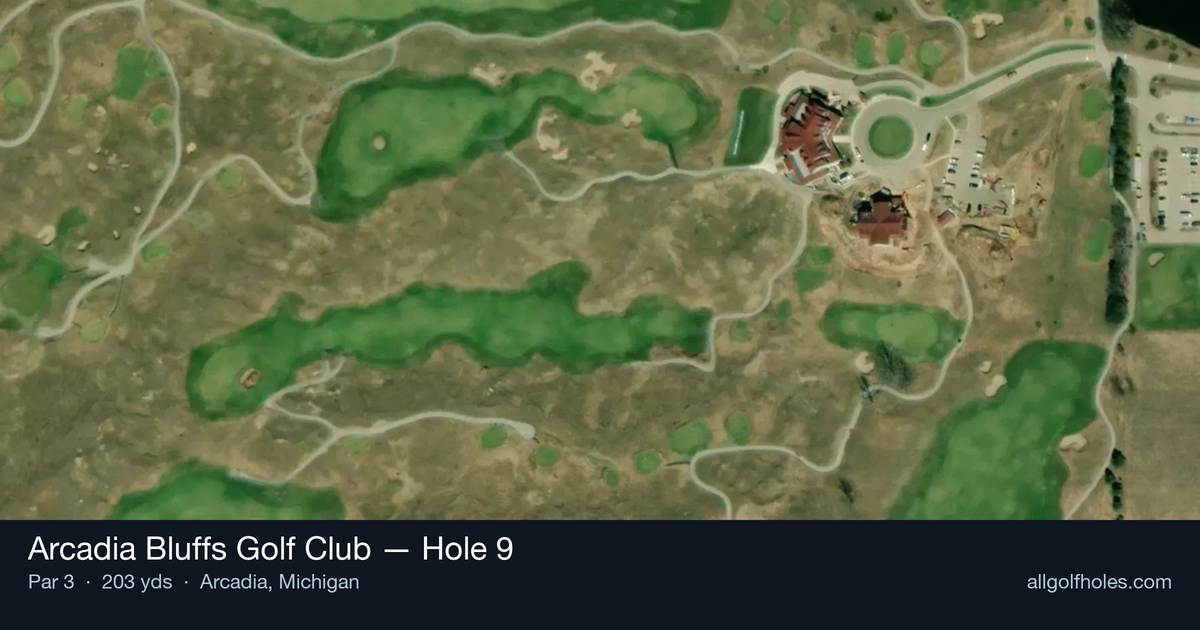
Aerial source not provided
Green size: 44 yds deep × 43 yds wide
Scorecard yardage is for Championship tees. The aerial shows its labeled reference position; distance rings measure to the green.
Championship tees · Par 3 · 203 yards
The plan for No. 9
The closing hole of the front nine at Arcadia Bluffs Golf Club presents a deceptive par 3 that exemplifies the course's strategic design philosophy. This 203-yard test plays away from Lake Michigan, often providing a helpful tailwind, but don't let the seemingly downhill appearance fool you—the hole actually plays slightly uphill. The green's treacherous false front serves as the primary defense, repelling short tee shots into a collection area below and leaving golfers with a challenging eye-level pitch shot. Club selection becomes critical as the visual deception can easily lead to coming up short. With the wind typically at your back and the unforgiving green complex demanding precision, this memorable par 3 rewards aggressive, confident swings while punishing tentative approaches.
Off the tee
Club selection is absolutely critical here, as the visual deception can easily lead to under-clubbing. Despite appearing to play downhill, take at least one extra club to account for the uphill trajectory. With the typical tailwind, you'll need to carefully balance the helping breeze against the uphill climb. A smooth swing with a longer iron or hybrid is often better than forcing a shorter club. Aim for the center or back portion of the green to avoid the collection area, as the false front will reject anything that lands short and rolls back down the slope.
Approach & recovery
Since this is a par 3, your tee shot is your approach. The key is committing to enough club and trusting your distance. The false front is unforgiving - shots that appear to be well-struck but come up just short will tumble back into the collection area, leaving a difficult uphill pitch shot. Focus on a controlled, committed swing rather than trying to finesse the distance. The small green size demands accuracy, so pick your target and execute with confidence.
On the green
Once you've successfully carried the false front, the putting surface rewards good shots. The small green means shorter putts overall, but the slopes around the edges can create tricky reads. Pay attention to the grain and any subtle breaks, as the elevated nature of the green can create some unexpected movements. Lag putting is essential if you find yourself with a longer putt, as three-putting from the back of the green is a real possibility. ## RISK VS REWARD The primary risk/reward decision centers on club selection and target choice. Playing aggressively to a back pin with enough club to clear the false front offers the best birdie opportunities but increases the risk of flying the small green entirely. Conservative play to the center of the green virtually guarantees avoiding the collection area but may leave longer birdie putts. The punishment for being short is severe - that eye-level pitch shot from the collection area is one of the most difficult recovery shots on the course. ## DIFFERENT SKILL LEVELS **High-handicap players** should prioritize getting on the green in regulation above all else. Take an extra club, aim for the largest part of the green, and accept a safe par. The false front penalty is too severe to risk coming up short. Focus on a smooth, controlled swing and don't let the tailwind tempt you into under-clubbing. **Low-handicap players** can be more aggressive with pin hunting, especially to back pins where the false front is less of a factor. Use the tailwind strategically, but still respect the uphill nature of the shot. Consider the pin position when selecting your target line - front pins demand extra precision and commitment to carrying the false front, while back pins allow for more aggressive play with longer clubs. The 9th hole exemplifies strategic golf course design, where visual deception and natural elements combine to test every aspect of your short game decision-making and execution.
Watch for
- Course conditioning and mapped hazards may affect line selection; confirm from the aerial.
Hole 9 Green Complex
Mapped green boundary
Green size: 10,557 sq ft
Course coverage
Tournament and creator videos about Arcadia Bluffs Golf Club — shared course coverage, not hole-specific clips.
Featured by these creators
Creator videos about this course
YouTube creators who filmed or featured Arcadia Bluffs Golf Club. · Stats as of Oct 12, 2026 · 5d ago
Course Record - Arcadia Bluffs
How did Hole 9 play?
How did this hole play today?
Frequently asked questions
Yardage reference: Championship tees · 203 yards.
What club should I use on this par 3?
↓
At 203 yards, most golfers will need a long iron or hybrid (5-iron to 6-iron) to reach this green. Adjust for elevation, wind, and pin position.
What hazards should I watch out for on hole 9?
↓
Key hazards include: 1 greenside bunker. Plan your shots to avoid these trouble spots.
How big is the green on hole 9?
↓
The green is large and can play quite long. The green is wider than it is deep, rewarding shots that find the correct tier. Three-putt territory if you don't manage your approach distance well.