Hole 7 at Standard Country Club, The
- Par
- 3
- Yardage
- 203 yds
- Stroke index
- 17
- Hazards
- 5 bunkers
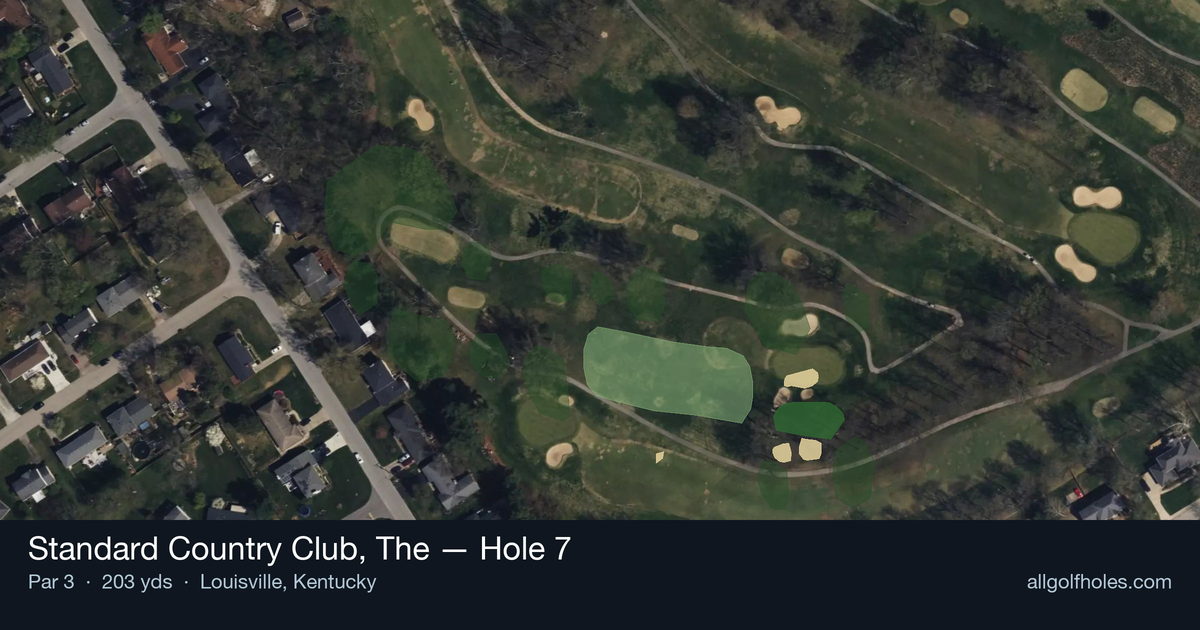
Aerial source not provided
Green size: 33 yds deep × 20 yds wide
Scorecard yardage is for Championship tees. The aerial shows its labeled reference position; distance rings measure to the green.
Championship tees · Par 3 · 203 yards
The plan for No. 7
The seventh hole at Standard Country Club presents a deceptively challenging par 3 that demands precision over power. At 203 yards, this straight-forward hole strips away complexity to focus on pure shot execution to a small, well-protected green. The elevated tee shot requires golfers to commit fully to their club selection, as the compact target leaves little margin for error. Despite being ranked as the course's easiest hole with a handicap of 17, seasoned players know that Standard Country Club's par 3s can humble even the most confident golfer. The absence of major hazards shifts the challenge entirely to distance control and accuracy, making this a true test of iron play where a precise tee shot is rewarded with birdie opportunities.
Off the tee
Club selection is critical on this hole - most players will need anywhere from a 6-iron to a hybrid depending on conditions and personal distances. Take one extra club and swing smoothly rather than forcing a shorter iron. Aim for the center of the green regardless of pin position, as the small target leaves little margin for error. Check wind conditions carefully, as a 203-yard shot gives wind plenty of time to affect ball flight. Commit fully to your club choice and swing with confidence.
Approach & recovery
Since this is a par 3, your tee shot IS your approach shot. Focus on solid contact over trying to get close to the pin. The straight layout means there's no preferred angle of attack - simply aim at your target and execute. With no hazards mentioned, missing slightly long or short shouldn't result in disaster, but the small green means precision is still rewarded.
On the green
Small greens typically feature subtle breaks that can be deceptive. Take time to read the putt carefully, as what appears flat may have more movement than expected. Focus on speed control - getting your first putt close is more important than being aggressive toward the hole. The green's compact size means most putts will be relatively short, so concentrate on starting the ball on your intended line. ## RISK VS REWARD This hole offers a straightforward risk/reward proposition: the reward of a birdie or easy par is there for players who commit to their yardage and execute properly. The risk is minimal given the lack of hazards, making this an ideal hole to be aggressive with your target selection while maintaining smooth tempo. ## DIFFERENT SKILL LEVELS **High-handicap players** should focus on getting the ball anywhere on the green rather than attacking pins. Choose a club that ensures you won't come up short, and aim for the center of the green. A bogey here shouldn't happen if you avoid short-siding yourself. **Low-handicap players** can be more aggressive with pin hunting, especially when the pin is in the center or back portions of the green. This is a hole where better players should expect to make birdie regularly, making it crucial for posting low scores on the overall round. The absence of significant trouble makes this hole more about execution than strategy - pick your target, select the right club, and trust your swing.
Watch for
- Course conditioning and mapped hazards may affect line selection; confirm from the aerial.
Hole 7 Green Complex
Mapped green boundary
Green size: 3,589 sq ft
How did Hole 7 play?
How did this hole play today?
Frequently asked questions
Yardage reference: Championship tees · 203 yards.
What club should I use on this par 3?
↓
At 203 yards, most golfers will need a long iron or hybrid (5-iron to 6-iron) to reach this green. Adjust for elevation, wind, and pin position.
How big is the green on hole 7?
↓
The green is small and requires precision. The green is wider than it is deep, rewarding shots that find the correct tier. Expect challenging pin positions with limited room for error.