Hole 3 at TPC at Deere Run
- Par
- 3
- Yardage
- 186 yds
- Stroke index
- 9
- Hazards
- 2 bunkers
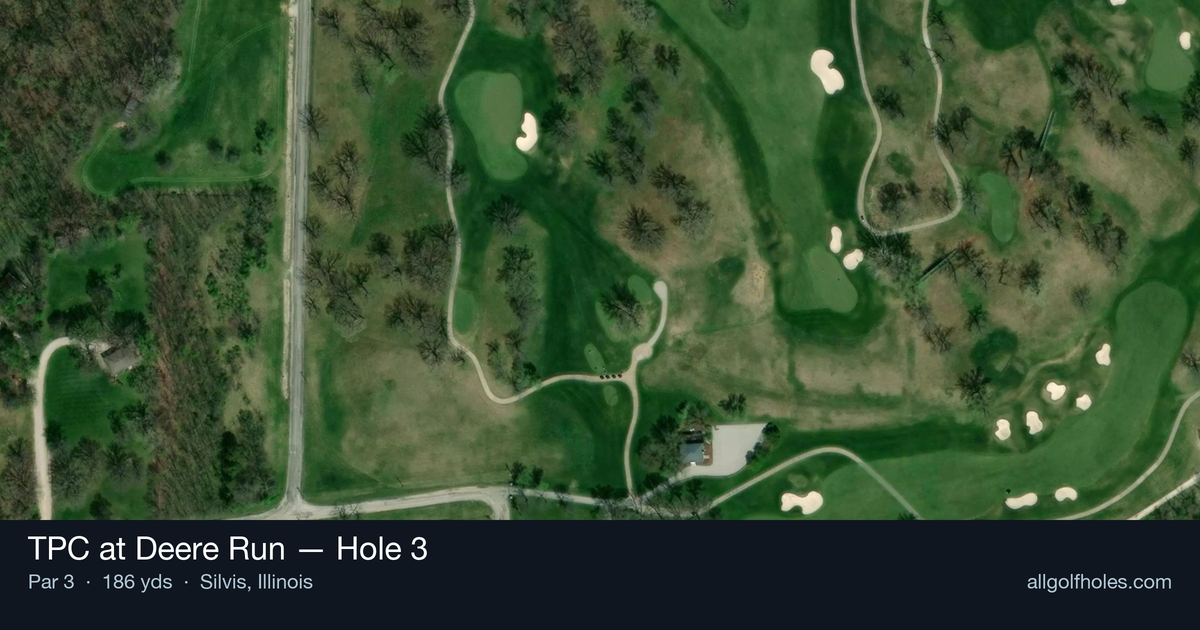
Aerial source not provided
Green size: 41 yds deep × 26 yds wide
Scorecard yardage is for Championship tees. The aerial shows its labeled reference position; distance rings measure to the green.
Championship tees · Par 3 · 186 yards
The plan for No. 3
TPC at Deere Run hole 3 presents a classic mid-length par 3 challenge at 186 yards, demanding precision over power from the elevated tee. This straightforward one-shotter showcases the course's commitment to strategic design, where club selection becomes paramount based on pin position and wind conditions. The small green complex requires an accurate tee shot, as missing the putting surface leaves challenging up-and-down opportunities. With minimal hazards protecting the target, this hole rewards confident ball-striking while punishing indecision or poor execution. The scenic views of the surrounding Illinois landscape provide a momentary distraction before golfers must focus on finding the heart of this demanding green, making it a memorable test early in the round.
Off the tee
Club selection is paramount on this hole, typically requiring a mid to long iron depending on conditions and pin position. The key is committing to your yardage and swinging with confidence rather than trying to guide the ball. Take one extra club and make a smooth, controlled swing rather than forcing a shorter iron. Pay attention to wind direction, as even a slight breeze can significantly affect ball flight on this length of shot. Aim for the center of the green unless you're confident in your distance control with a specific pin position. The straight layout means your primary focus should be on the target line directly at your intended landing spot.
Approach & recovery
Since this is a par 3, your tee shot is your approach shot. The small green demands precision, so favor the middle of the putting surface over aggressive pin hunting unless you're striking the ball exceptionally well. Consider the pin position when selecting your landing area - front pins may require a more aggressive carry, while back pins allow for a safer approach to the center of the green. With no significant hazards protecting the green, missing short or long becomes the primary concern, making distance control your top priority.
On the green
The small green size means every putt matters significantly for your score. Focus on lag putting to avoid three-putts, as the compact surface can make longer putts tricky to judge. Read the green carefully from behind your ball, as subtle breaks can be deceiving on smaller putting surfaces. Pay attention to the grain and any slope, as these factors become magnified when you have less green to work with. Position your approach shots below the hole when possible to ensure uphill putts for better speed control. ## RISK VS REWARD This hole offers a straightforward risk/reward proposition: aggressive pin hunting versus conservative center-green strategy. The reward for attacking tucked pins is a potential birdie opportunity, but the risk increases with the small target area. Smart course management suggests playing to the fat part of the green early in the round or when struggling with ball-striking, then becoming more aggressive as confidence builds. The lack of major hazards means the penalty for missing isn't severe, making this a good hole to be slightly more aggressive if you're feeling confident. ## DIFFERENT SKILL LEVELS **High-Handicap Players:** Focus on making solid contact and getting the ball on the green rather than attacking specific pin positions. Take enough club to ensure you reach the putting surface, as coming up short is often more costly than being long. Practice your pre-shot routine to build confidence, and don't be afraid to aim for the center of the green regardless of pin position. **Low-Handicap Players:** This hole offers an excellent birdie opportunity with precise distance control and committed swings. Consider pin position more aggressively, but maintain respect for the small target. Use this hole to build momentum early in the round, as confident iron play here can set the tone for strong scoring throughout the day. Focus on leaving yourself uphill putts when possible by considering subtle green contours in your approach strategy.
Watch for
- Course conditioning and mapped hazards may affect line selection; confirm from the aerial.
Hole 3 Green Complex
Mapped green boundary
Green size: 6,041 sq ft
How did Hole 3 play?
How did this hole play today?
Frequently asked questions
Yardage reference: Championship tees · 186 yards.
What club should I use on this par 3?
↓
At 186 yards, most golfers will need a long iron or hybrid (5-iron to 6-iron) to reach this green. Adjust for elevation, wind, and pin position.
How difficult is hole 3?
↓
This hole is a good scoring opportunity for most golfers.
How big is the green on hole 3?
↓
The green is fairly large with multiple pin positions. The green is deeper than wide, so club selection is crucial. Lag putting becomes important on longer putts.