Hole 11 at Kapalua Resort (Plantation course)
- Par
- 3
- Yardage
- 164 yds
- Stroke index
- 18
- Hazards
- 6 bunkers
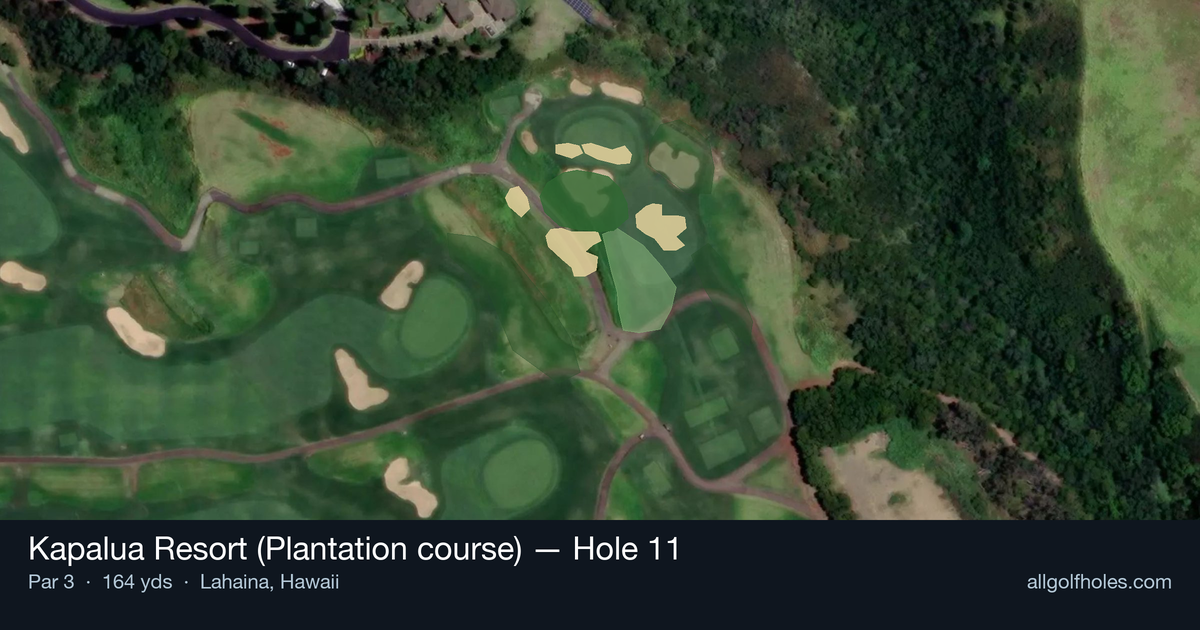
Aerial source not provided
Green size: 35 yds deep × 40 yds wide
Scorecard yardage is for Championship tees. The aerial shows its labeled reference position; distance rings measure to the green.
Championship tees · Par 3 · 164 yards
The plan for No. 11
The 164-yard 11th hole at Kapalua Resort's Plantation course serves as a deceptive breather in the middle of this championship layout. Despite being the easiest handicap on the course, this par 3 demands precision over a straightforward carry to a small, well-protected green. The absence of major hazards might suggest simplicity, but the compact target and Hawaii's notorious trade winds create their own challenges. Club selection becomes critical as the green offers little margin for error, rewarding accurate iron play while punishing wayward shots with difficult recovery positions. It's a classic risk-reward par 3 that epitomizes Kapalua's strategic design philosophy.
Off the tee
Your tee shot strategy should focus on smooth tempo and solid contact rather than trying to overpower this shorter par 3. Select a club that comfortably covers the yardage - typically a mid-iron for most players in normal conditions. Aim for the center of the green unless the pin position clearly favors one side. The trade winds common to Kapalua can significantly affect ball flight, so factor in wind direction and strength when making your club selection. Take one extra club if there's any doubt, as missing long is often preferable to coming up short on this hole.
Approach & recovery
Since this is a par 3, your tee shot serves as your approach shot. Focus on a controlled, balanced swing that prioritizes accuracy over distance. The small green size means there's little room for error, so commit fully to your club choice and swing with confidence. Pay attention to the pin position - when the flag is tucked to one side, consider whether the risk of attacking it is worth the potential reward based on your skill level.
On the green
The small green size means putting will be relatively straightforward in terms of distance, but reading the subtle breaks becomes more critical. Take time to study the green's contours during your approach, as the compact surface can have deceptive slopes. Focus on lag putting to ensure you don't leave yourself with challenging comeback putts on this scoring hole.
Watch for
- Sand — Crossing center (center)
- Woods — Crossing center (center)
Hole 11 Green Complex
Mapped green boundary
Green size: 6,667 sq ft
How did Hole 11 play?
How did this hole play today?
Frequently asked questions
Yardage reference: Championship tees · 164 yards.
What club should I use on this par 3?
↓
At 164 yards, most golfers will need a mid-iron (7-iron to 8-iron) to reach this green. Adjust for elevation, wind, and pin position.
How difficult is hole 11?
↓
This hole is a good scoring opportunity for most golfers.
How big is the green on hole 11?
↓
The green is fairly large with multiple pin positions. Lag putting becomes important on longer putts.
What's a good score on hole 11?
↓
This hole is a solid par with birdie chances for precise approach shots. Making par is a good result here. Focus on hitting the green and avoiding three-putts.