Hole 5 at La Costa Resort and Spa (South course)
- Par
- 4
- Yardage
- 406 yds
- Stroke index
- 5
- Hazards
- 8 bunkers
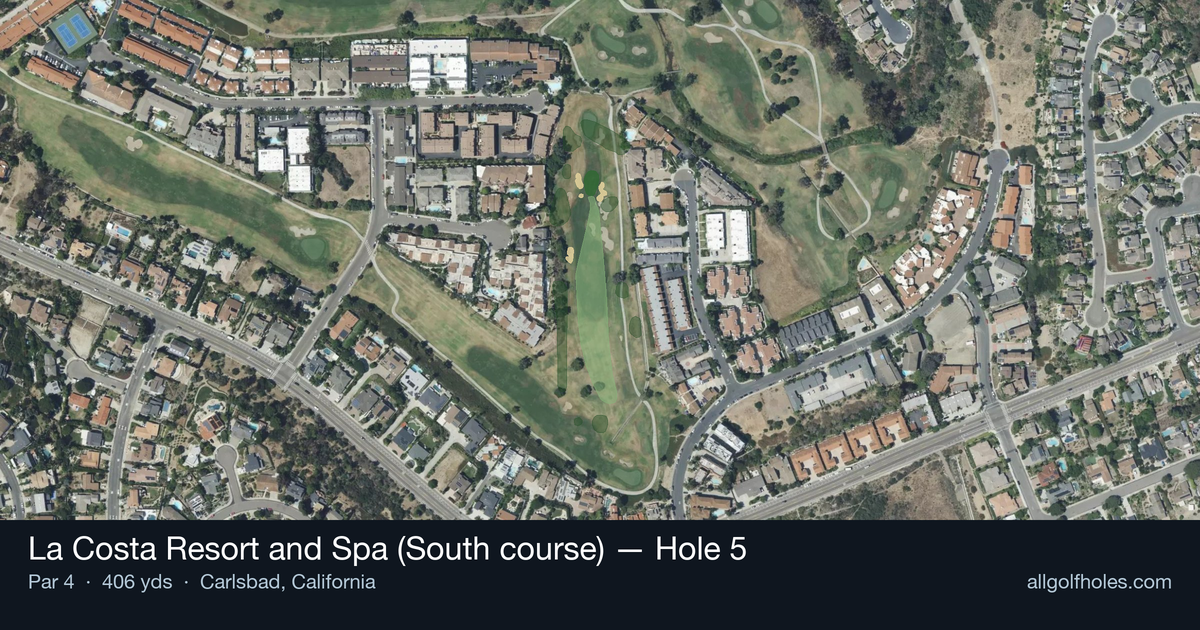
Aerial source not provided
Green size: 28 yds deep × 18 yds wide
Scorecard yardage is for Championship tees. The aerial shows its labeled reference position; distance rings measure to the green.
Championship tees · Par 4 · 406 yards
The plan for No. 5
The fifth hole at La Costa Resort and Spa (South course) presents a deceptively challenging 406-yard par 4 that demands both precision and strategy. This straight-away layout may appear straightforward from the tee, but the small green complex serves as the hole's primary defense, requiring golfers to dial in their approach shots with surgical precision. The absence of major hazards places the entire emphasis on course management and shot execution, making this the type of hole where par feels like a victory. With its number 5 handicap ranking, this hole consistently tests players' ability to find the compact putting surface from various approach angles. The premium on accuracy over distance makes club selection crucial, as missing the small green leaves challenging up-and-down opportunities that can quickly turn par into bogey.
Off the tee
The tee shot strategy centers on positioning yourself for the optimal approach angle while avoiding any rough or marginal lies. With the straight layout, aim for the center-left portion of the fairway to open up the best angle to the small green. Most players should consider a controlled driver or strong 3-wood, focusing on finding the short grass rather than maximizing distance. The key target line runs down the middle of the fairway, giving yourself the widest margin for error while setting up a manageable approach distance.
Approach & recovery
The approach shot is where this hole shows its teeth. The small green demands exceptional accuracy, making club selection critical. Favor taking one extra club to ensure you can make an aggressive, controlled swing rather than forcing a shot. Aim for the center of the green regardless of pin position - the small target makes going directly at tucked pins a high-risk proposition. Focus on a smooth tempo and solid contact, as any mishit will likely find trouble around the green or leave you with a difficult recovery.
On the green
The small green creates challenging putting scenarios even from seemingly favorable positions. Expect subtle breaks that can be difficult to read, and pay particular attention to your speed control since there's limited room for error. Lag putting becomes crucial here - getting your first putt close is more important than being aggressive toward the hole. Study the green's surroundings during your approach to better understand the predominant slopes and drainage patterns. ## RISK VS REWARD This hole offers limited risk/reward opportunities, instead rewarding conservative, percentage golf. The main decision point comes with club selection on the approach - the reward for aggressive pin-seeking is minimal compared to the penalty for missing the small target. The smart play is accepting the center of the green and relying on solid putting rather than forcing heroic approach shots. ## DIFFERENT SKILL LEVELS **High-Handicap Players:** Focus entirely on finding the fairway with your most reliable tee shot, even if it means using a hybrid or long iron. On the approach, aim for the largest portion of the green and don't worry about pin position. Two-putt pars are excellent scores here. **Low-Handicap Players:** Can be more aggressive off the tee with driver while still prioritizing accuracy. Should consider pin position more carefully but still err toward the center of the green. The small target makes this a hole where even skilled players should prioritize avoiding bogey over chasing birdie. The key to conquering this hole lies in embracing its strategic demands - patience, precision, and smart course management will consistently produce better results than attempting to overpower what appears to be a straightforward par 4.
Watch for
- Course conditioning and mapped hazards may affect line selection; confirm from the aerial.
Hole 5 Green Complex
Mapped green boundary
Green size: 2,658 sq ft
How did Hole 5 play?
How did this hole play today?
Frequently asked questions
Yardage reference: Championship tees · 406 yards.
What's the best strategy off the tee?
↓
For this 406-yard par 4, most players will hit driver to set up a comfortable approach.
How difficult is hole 5?
↓
This hole is a good scoring opportunity for most golfers.