Hole 7 at Memorial Park Golf Course
- Par
- 3
- Yardage
- 216 yds
- Stroke index
- 7
- Hazards
- 1 bunker · Water
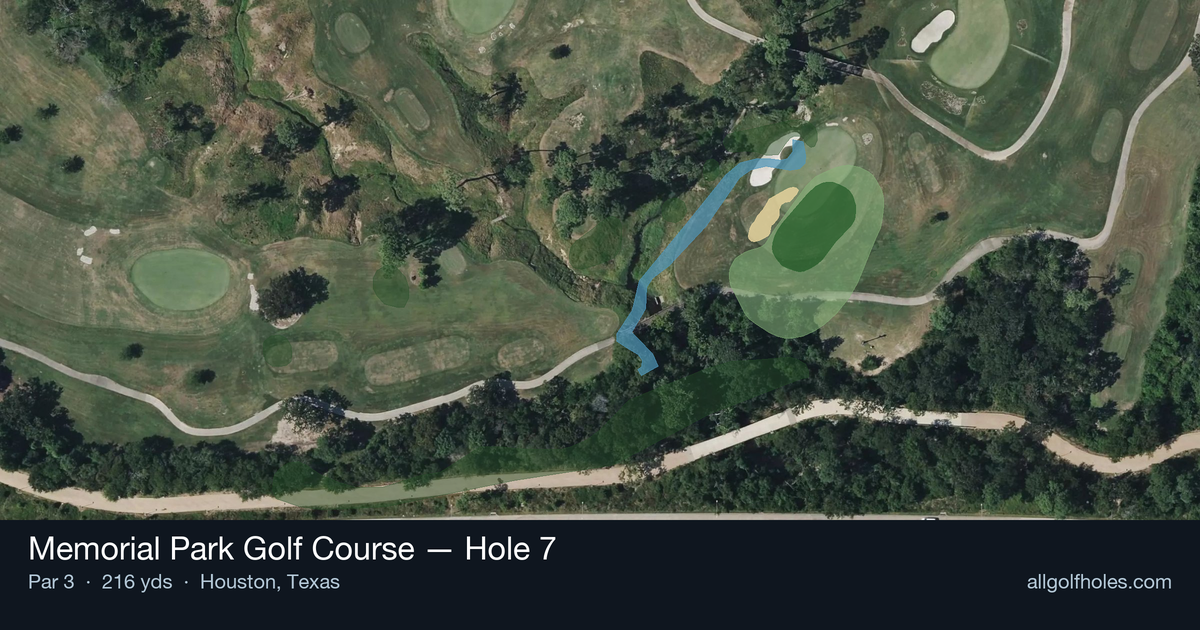
Aerial source not provided
Green size: 36 yds deep × 29 yds wide
Scorecard yardage is for Championship tees. The aerial shows its labeled reference position; distance rings measure to the green.
Championship tees · Par 3 · 216 yards
The plan for No. 7
Memorial Park Golf Course hole 7 presents a deceptively challenging 216-yard par 3 that demands precision over power. This mid-length one-shotter features a small, well-protected green that rewards accurate iron play while punishing wayward shots. The relatively straight approach allows golfers to focus purely on distance control and pin placement, but the compact target leaves little margin for error. What makes this hole particularly memorable is its role in testing a player's mid-iron game under pressure. The absence of major hazards might suggest an easier challenge, but the small green complex creates its own demanding test of accuracy. Smart course management calls for aiming for the center of the green regardless of pin position, as the premium lies on finding the putting surface rather than attacking tucked pins. This strategic par 3 epitomizes Memorial Park's thoughtful design philosophy.
Off the tee
Your tee shot IS your approach shot on this par 3, so precision is paramount. Most golfers will need anywhere from a 5-iron to a hybrid or fairway wood depending on conditions and personal distance. The key is selecting enough club to comfortably reach the green without forcing a swing. Target the center of the green as your primary aim point, as the small target leaves little room for aggressive pin-hunting. Pay close attention to wind conditions - at this length, even a moderate breeze can affect club selection significantly. Take one extra club if there's any doubt, as coming up short of a small green often leads to difficult recovery shots.
Approach & recovery
Since this is a par 3, your approach strategy is built into your tee shot selection. The straight layout means you can commit fully to your target line without worrying about doglegs or hidden trouble. Focus on making a smooth, controlled swing rather than trying to muscle the ball to the green. With a small green, aim for the fat part of the putting surface rather than attacking tucked pins. The green shape being unknown means you'll need to rely on visual assessment from the tee - look for the widest part of the green and favor that area regardless of pin position.
On the green
Small greens typically feature subtle breaks that can be deceptive. Take time to read the overall slope and grain direction during your approach to the tee. Two-putt strategy should be your priority - getting close enough for a comfortable second putt is more valuable than aggressive attempts at every pin. Pay attention to the green's firmness, as this will affect both your approach shot strategy and putting speed. Firm conditions mean the ball will release more, while softer greens will hold shots better but may play slower on putts. ## RISK VS REWARD This hole offers a classic risk/reward decision in club selection. The conservative play is taking enough club to ensure you reach the green, even if it means potentially going long. The aggressive approach involves taking less club to get closer to pins, but risks coming up short and facing difficult recovery shots. Given the small target and lack of major hazards, the smart play favors the conservative approach. Par is a good score here, and avoiding short misses should be the primary objective. ## DIFFERENT SKILL LEVELS **High-Handicap Players:** Focus entirely on getting the ball on the green, regardless of pin position. Take plenty of club and aim for the center of the green. Don't be afraid to use a hybrid or fairway wood if that's your most reliable long club. A bogey from the green is better than a double-bogey from short of it. **Low-Handicap Players:** You can be more aggressive with pin positions, especially when the flag is in the center portion of the green. Consider the wind and green conditions more carefully, and don't hesitate to take dead aim when conditions favor precision. Your superior distance control allows for more nuanced club selection based on pin position and conditions. The key for all golfers is recognizing that this hole rewards patience and precision over power. Smart course management and conservative target selection will lead to better scoring than aggressive pin-hunting on this demanding par 3.
Watch for
- Course conditioning and mapped hazards may affect line selection; confirm from the aerial.
Hole 7 Green Complex
Mapped green boundary
Green size: 4,694 sq ft
Course coverage
Tournament and creator videos about Memorial Park Golf Course — shared course coverage, not hole-specific clips.
Tournament coverage
Texas Children's Houston Open highlights
Texas Children's Houston Open | Final Round Highlights
2025
How did Hole 7 play?
How did this hole play today?
Frequently asked questions
Yardage reference: Championship tees · 216 yards.
What club should I use on this par 3?
↓
At 216 yards, most golfers will need a fairway wood or hybrid to reach this green. Adjust for elevation, wind, and pin position.
How difficult is hole 7?
↓
This hole is a moderate challenge for most golfers. Key challenges include: long par 3.
What's a good score on hole 7?
↓
This hole is a challenging par where bogey is acceptable. This longer par 3 will test your long iron or hybrid game. Par is a good score.