Hole 6 at Oakmont Country Club
- Par
- 3
- Yardage
- 194 yds
- Stroke index
- 17
- Hazards
- 6 bunkers
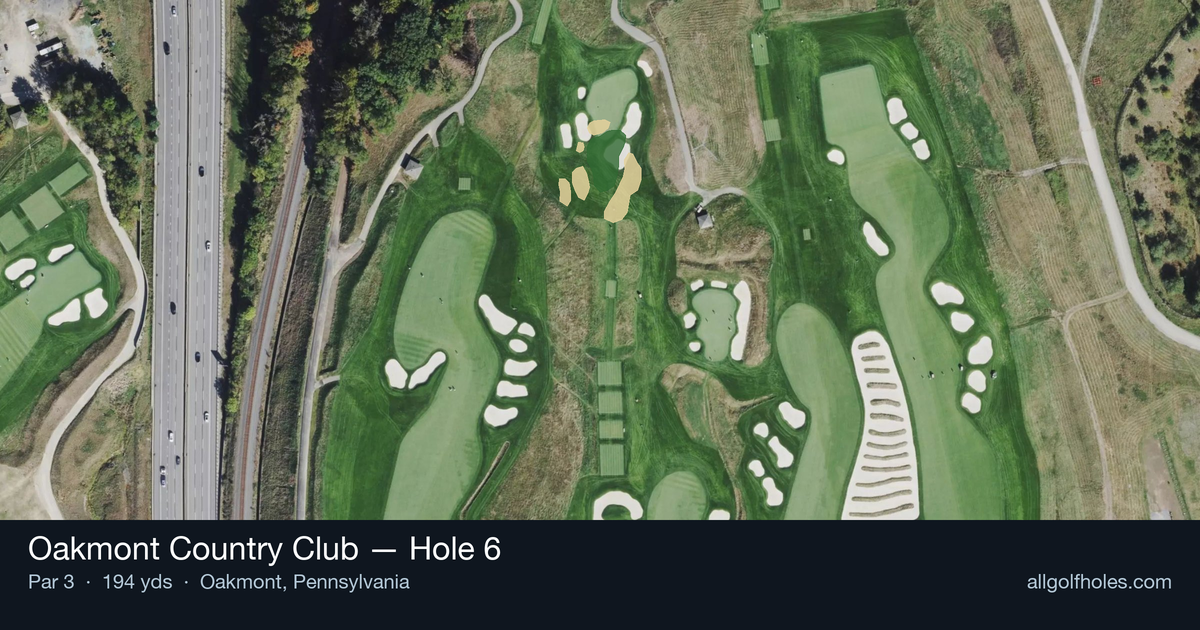
Aerial source not provided
Green size: 34 yds deep × 22 yds wide
Scorecard yardage is for Championship tees. The aerial shows its labeled reference position; distance rings measure to the green.
Championship tees · Par 3 · 194 yards
The plan for No. 6
The sixth hole at Oakmont Country Club presents a deceptively challenging par 3 that demands precision over power. At 194 yards, this straight shot requires golfers to navigate to a small, well-protected green that sits as the ultimate test of iron play accuracy. The absence of major hazards might suggest simplicity, but Oakmont's legendary conditioning and subtle green contours create their own formidable defense. With its high handicap ranking, this hole often catches players off-guard who underestimate the challenge of hitting and holding such a compact target. The green's modest size leaves little margin for error, rewarding only the most committed and precise tee shots. Success here comes down to club selection, wind assessment, and the mental fortitude that Oakmont Country Club demands from every golfer who steps onto its storied grounds.
Off the tee
Your tee shot strategy should prioritize hitting the center of the green regardless of pin position. With a small target, aggressive pin-hunting often leads to trouble at Oakmont. Select a club that you can swing with confidence - typically a mid to long iron depending on conditions and your carry distances. The key is committing fully to your club selection rather than trying to finesse a shot between clubs. Aim for the heart of the green and trust that a well-struck shot to the center will leave you with a reasonable putt regardless of where the pin is located. Factor in Oakmont's typically firm conditions, which can add significant roll to your ball flight. Consider taking one less club than the yardage suggests if the greens are running fast.
Approach & recovery
Since this is a par 3, your tee shot IS your approach. The critical element is understanding that Oakmont's greens are built to reject imperfect shots. Even with no major hazards, missing the small green means facing one of golf's most challenging up-and-down scenarios. The rough around Oakmont's greens is typically penal, and the green's firmness makes recovery shots extremely difficult. Focus on a smooth, controlled swing that prioritizes solid contact over trying to dial in exact yardages. The green's small size means that a well-struck shot with proper trajectory will hold, while a mishit - even if it travels the correct distance - may not stop on the putting surface.
On the green
Oakmont's greens are legendary for their speed and subtle breaks that can fool even professional golfers. On the 6th, with its small green, lag putting becomes paramount. Your first priority should be leaving yourself below the hole whenever possible, as uphill putts are far more manageable on these lightning-fast surfaces. Study the overall slope of the green and surrounding terrain to understand the general drainage pattern. Even seemingly straight putts at Oakmont often have subtle breaks that become magnified by the green speed. Practice your distance control extensively, as three-putting from anywhere on this green is a real possibility if you're not careful with your speed. ## RISK VS REWARD The primary risk/reward decision on this hole involves pin position strategy. When the pin is tucked in a corner or on a slope, the reward of getting close must be weighed against the significant risk of missing the green entirely. At Oakmont, the conservative play to the center of the green is almost always the percentage shot. The real reward comes from simply hitting and holding the green in regulation, giving yourself a legitimate birdie opportunity. The risk of being aggressive with pin position rarely justifies the potential outcome, especially given how difficult recovery shots can be from Oakmont's surrounds. ## DIFFERENT SKILL LEVELS **High Handicap Players:** Focus entirely on hitting the green - any part of it. Take enough club to ensure you reach the putting surface, and aim for the absolute center regardless of pin position. Your goal should be bogey or better, and getting on the green gives you that opportunity. **Mid Handicap Players:** Still prioritize the center of the green, but you can begin to favor the side where the pin is located without being overly aggressive. Pay close attention to wind conditions and green firmness when making your club selection. **Low Handicap Players:** You have the precision to attack certain pin positions, but at Oakmont, discretion is often the better part of valor. Consider the day's conditions, your confidence level, and the overall flow of your round when deciding how aggressive to be. Even tour professionals often aim for the center of Oakmont's greens rather than chasing pins. The 6th hole rewards patience, precision, and respect for the venue's demanding standards - qualities that define successful play at Oakmont Country Club.
Watch for
- Crossing center
Hole 6 Green Complex
Mapped green boundary
Green size: 4,101 sq ft
Course coverage
Tournament and creator videos about Oakmont Country Club — shared course coverage, not hole-specific clips.
Featured by these creators
Creator videos about this course
YouTube creators who filmed or featured Oakmont Country Club. · Stats as of Oct 12, 2026 · 6d ago
The World's Hardest Golf Course: Oakmont Country Club
Deep Dive: Oakmont Country Club | Designing Golf
The Architecture of Oakmont Country Club | 2025 U.S. Open Preview
How did Hole 6 play?
How did this hole play today?
Frequently asked questions
Yardage reference: Championship tees · 194 yards.
What club should I use on this par 3?
↓
At 194 yards, most golfers will need a long iron or hybrid (5-iron to 6-iron) to reach this green. Adjust for elevation, wind, and pin position.
How difficult is hole 6?
↓
This hole is a moderate challenge for most golfers. Key challenges include: small green.
How big is the green on hole 6?
↓
The green is small and requires precision. The green is deeper than wide, so club selection is crucial. Expect challenging pin positions with limited room for error.