Hole 15 at Oakmont Country Club
- Par
- 4
- Yardage
- 499 yds
- Stroke index
- 8
- Hazards
- 7 bunkers
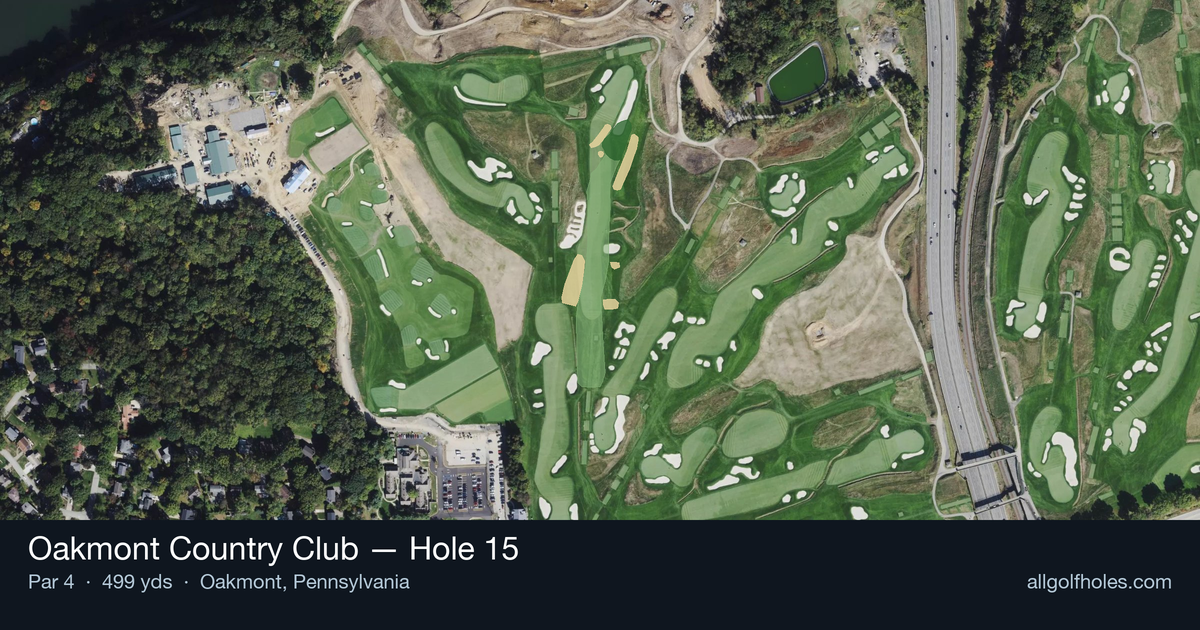
Aerial source not provided
Green size: 56 yds deep × 37 yds wide
Scorecard yardage is for Championship tees. The aerial shows its labeled reference position; distance rings measure to the green.
Championship tees · Par 4 · 499 yards
The plan for No. 15
The longest par 4 at Oakmont Country Club, hole 15 stretches 499 yards of pure challenge that tests every aspect of a golfer's game. This straight-away hole demands precision from tee to green, with no room for error on one of golf's most demanding courses. The tee shot requires accuracy to find the fairway, setting up a lengthy approach to a small, well-protected green complex. Despite the absence of major water hazards or bunkers directly in play, Oakmont's notorious rough and lightning-fast greens provide all the defense this hole needs. The compact green demands surgical precision on the approach shot, making distance control paramount. This hole exemplifies Oakmont's philosophy that great golf holes don't need artificial hazards when natural challenge and strategic design create memorable golf.
Off the tee
The tee shot strategy centers on finding the optimal balance between distance and control. With no significant hazards to navigate, aggressive players can take aim down the center of the fairway with their driver, focusing on maximum carry to shorten the lengthy approach. The target line should favor the center-left portion of the fairway, as this typically provides the best angle for the approach shot. However, Oakmont's firm conditions and potential crosswinds demand respect - a controlled fade or draw that finds the fairway is far superior to a longer shot that misses the short grass.
Approach & recovery
The approach shot represents the hole's primary challenge, as most players will face a long iron or fairway wood to reach the small green. Club selection becomes critical - it's better to take one extra club and swing smoothly than to force a shorter iron. Aim for the center of the green regardless of pin position, as the compact target leaves little margin for error. The key is committing fully to your club selection and making solid contact, as any mishit will likely leave you short or offline.
On the green
Oakmont's greens are legendary for their speed and subtle breaks, and this small putting surface amplifies those challenges. Focus on getting your first putt close rather than being aggressive with longer putts. The compact size means most putts will have manageable length, but reading the grain and slope becomes crucial. Lag putting technique is essential - getting the ball to die at the hole rather than charging past will save strokes over the round. ## RISK VS REWARD This hole offers limited risk/reward opportunities given its straightforward design, making it more about execution than gambling. The primary decision point comes with tee shot club selection - longer hitters might consider a 3-wood for improved accuracy if they can still reach the green with a manageable approach club. The reward for finding the fairway is a clear shot at the green; the penalty for missing is a significantly more difficult approach from Oakmont's challenging rough. ## DIFFERENT SKILL LEVELS **High-handicap players** should prioritize keeping the ball in play over maximum distance. Consider a fairway wood or hybrid off the tee to ensure finding the fairway, then focus on advancing the ball as close to the green as possible with the approach, even if it means laying up short. Two-putting from anywhere on the green represents a solid result. **Low-handicap players** can be more aggressive with driver off the tee, using their superior ball-striking to attack the pin with their approach shot. These players should study the green's subtle contours and use course management to leave themselves below the hole when possible, setting up uphill putts on Oakmont's lightning-fast surfaces. The 15th hole rewards patient, strategic golf - those who respect its length and execute two quality shots will find scoring opportunities, while rushed or overly aggressive play often leads to bogey or worse.
Watch for
- Crossing center
Hole 15 Green Complex
Mapped green boundary
Green size: 10,402 sq ft
Course coverage
Tournament and creator videos about Oakmont Country Club — shared course coverage, not hole-specific clips.
Featured by these creators
Creator videos about this course
YouTube creators who filmed or featured Oakmont Country Club. · Stats as of Oct 12, 2026 · 6d ago
The World's Hardest Golf Course: Oakmont Country Club
Deep Dive: Oakmont Country Club | Designing Golf
The Architecture of Oakmont Country Club | 2025 U.S. Open Preview
How did Hole 15 play?
How did this hole play today?
Frequently asked questions
Yardage reference: Championship tees · 499 yards.
What's the best strategy off the tee?
↓
For this 499-yard par 4, most players will hit driver to set up a comfortable approach.
How difficult is hole 15?
↓
This hole is a moderate challenge for most golfers. Key challenges include: long par 4, large green requiring good lag putting.
How big is the green on hole 15?
↓
The green is large and can play quite long. Three-putt territory if you don't manage your approach distance well.
What's a good score on hole 15?
↓
This hole is one of the tougher holes where par feels like birdie. A challenging par 4. Accept that bogey happens and avoid big numbers.