Hole 6 at Cascata
- Par
- 4
- Yardage
- 379 yds
- Stroke index
- 13
- Hazards
- 3 bunkers
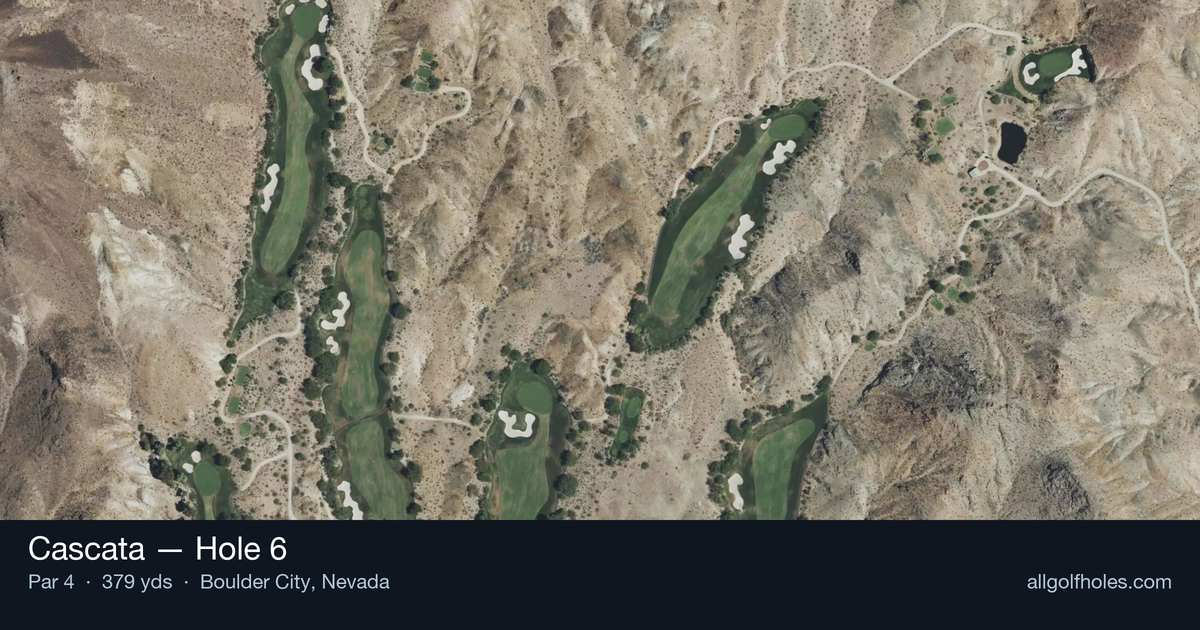
Aerial source not provided
Green size: 30 yds deep × 30 yds wide
Scorecard yardage is for Championship tees. The aerial shows its labeled reference position; distance rings measure to the green.
Championship tees · Par 4 · 379 yards
The plan for No. 6
Cascata hole 6 presents a deceptively challenging uphill par 4 that demands both precision and course management. This 379-yard test features a subtle right-to-left slope that can catch unwary golfers off guard, with the fairway gently favoring the right side throughout. The defining feature is a prominent bunker positioned strategically on the right side in the prime landing area, forcing players to carefully consider their tee shot placement. The uphill approach to the small green requires club selection adjustments, as the elevation change can easily fool even experienced players. What makes this hole memorable is how it rewards thoughtful strategy over raw power, with the combination of upslope, directional bias, and well-placed hazards creating multiple decision points that test every aspect of your short game.
Off the tee
The optimal tee shot strategy centers on avoiding the large bunker complex positioned between 215-260 yards on the right side. Given the hole's rightward slope, even well-struck shots will naturally drift in that direction. Target your drive down the left-center of the fairway to account for this movement. For most golfers, a controlled driver or strong 3-wood will provide the ideal combination of distance and accuracy. The uphill nature means you'll need every yard you can safely achieve to set up a manageable approach shot. Focus on a smooth, balanced swing rather than trying to overpower the hole.
Approach & recovery
The approach shot requires careful club selection due to the uphill lie and small green target. Take at least one extra club to account for the elevation change, and consider the pin position carefully. The compact green size leaves little margin for error, making center-green the safest target for most approach shots. Wind conditions in the Nevada desert can significantly impact club selection, so factor in any crosswinds or headwinds. A mid-iron to long-iron depending on your tee shot position will typically be required, with emphasis on solid contact and trajectory control.
On the green
The small green demands precise putting and careful speed control. Desert greens can vary significantly in pace throughout the day, so take time to read the first putt carefully. Focus on leaving approach shots below the hole when possible, as uphill putts are generally more manageable on smaller surfaces. Pay attention to any subtle breaks that may be influenced by the surrounding terrain's rightward slope. Conservative putting strategy often pays dividends here - getting close and making the second putt is preferable to aggressive lines that could lead to three-putts. ## RISK VS REWARD This hole offers limited risk/reward opportunities, making it more about solid execution than aggressive play. The primary risk comes from challenging the right-side bunker to gain a better approach angle - a gamble that rarely pays off given the small green target. The reward for conservative, well-executed shots is significant: this represents one of the better birdie opportunities on the front nine when played intelligently. ## DIFFERENT SKILL LEVELS **High-Handicap Players:** Focus on keeping the ball in play off the tee, aiming well left of center to avoid the right-side trouble. Accept that this may be a bogey hole and play for the center of the green with your approach. Two-putt pars are excellent scores here. **Low-Handicap Players:** Can be more aggressive with driver placement, using the extra distance to set up shorter approach shots. Still respect the bunker positioning but can work closer to optimal angles. Target specific quadrants of the green based on pin position, but always err on the side of caution given the small target. The 6th hole rewards patience and precision over power, making it a true test of course management skills in the beautiful Nevada desert setting.
Watch for
- Course conditioning and mapped hazards may affect line selection; confirm from the aerial.
Hole 6 Green Complex
Mapped green boundary
Green size: 4,435 sq ft
How did Hole 6 play?
How did this hole play today?
Frequently asked questions
Yardage reference: Championship tees · 379 yards.
What's the best strategy off the tee?
↓
For this 379-yard par 4, most players will hit 3-wood or driver to set up a comfortable approach.
How difficult is hole 6?
↓
This hole is a good scoring opportunity for most golfers. Key challenges include: small green.
How big is the green on hole 6?
↓
The green is small and requires precision. The green is wider than it is deep, rewarding shots that find the correct tier. Expect challenging pin positions with limited room for error.
What's a good score on hole 6?
↓
This hole is a medium-length test where par is a solid result. A straightforward par 4 where course management pays off.