Hole 4 at The Concession Golf Club
- Par
- 3
- Yardage
- 237 yds
- Hazards
- 3 bunkers
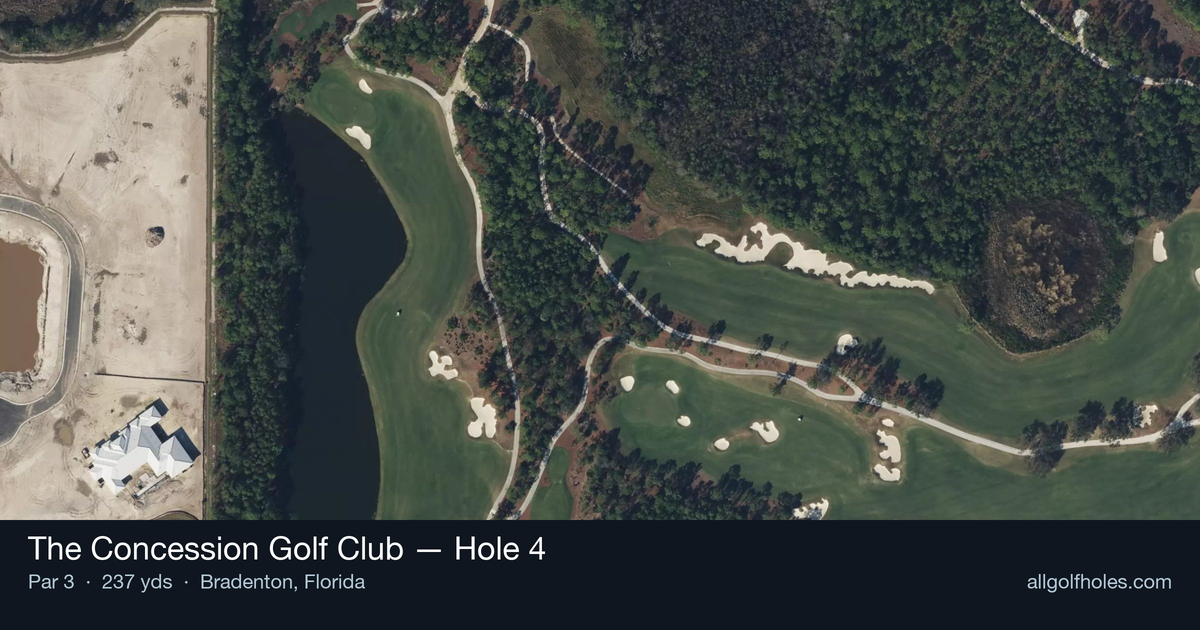
Aerial source not provided
Green size: 26 yds deep × 39 yds wide
Scorecard yardage is for Championship tees. The aerial shows its labeled reference position; distance rings measure to the green.
Championship tees · Par 3 · 237 yards
The plan for No. 4
The fourth hole at The Concession Golf Club stands as a formidable test of precision and nerve, embodying the championship pedigree of this Nicklaus-Jacklin masterpiece. This demanding 237-yard par 3 requires golfers to commit fully to their tee shot, with no room for tentative swings or second-guessing club selection. The straight-line approach to a compact green complex demands both distance control and accuracy, making it one of the more challenging one-shotters on Florida's Gulf Coast. With minimal hazards to distract the eye, the hole's difficulty lies in its deceptive simplicity and the premium it places on execution. At a course known for hosting professional events and boasting the Tampa Bay area's highest slope rating, this par 3 exemplifies the strategic thinking that made both designers legends of the game.
Off the tee
Club selection is absolutely critical on this demanding one-shotter. Most players will need a long iron, hybrid, or fairway wood depending on conditions and pin position. The straight layout allows you to aim directly at your target, but the small green demands precision over power. Focus on a smooth, controlled swing rather than trying to muscle the ball to the pin. Wind conditions in Florida can dramatically affect club selection, so pay close attention to the flags and feel the breeze before committing to your club. A conservative approach targeting the center of the green is often the smartest play, as the small putting surface leaves little margin for error on approach shots from greenside rough or bunkers.
Approach & recovery
Since this is a par-3, your tee shot IS your approach shot. The key is committing fully to your club selection and target line. With a small green, there's no room for tentative swings or second-guessing. Pick your spot on the green - typically the center unless the pin is in an easily accessible location - and execute with confidence. The straight layout means you can focus entirely on distance control rather than worrying about angles or doglegs. This actually makes the hole more demanding, as there are no excuses for missing your line. Trust your yardage, account for conditions, and make a committed swing.
On the green
The small green size means that even successful approaches may leave challenging putts. Expect subtle breaks and quick putting surfaces typical of a Nicklaus-Jacklin design. Focus on getting your first putt close rather than being overly aggressive, as three-putts can quickly turn a good hole into a disaster. Pin position will significantly affect the difficulty of this green. When the flag is tucked near edges, the smart play is often the fat part of the green, accepting a longer putt in exchange for avoiding short-sided situations.
Watch for
- Use mapped hazard edges on the course map for this hole.
Hole 4 Green Complex
Mapped green boundary
Green size: 4,781 sq ft
Course coverage
Tournament and creator videos about The Concession Golf Club — shared course coverage, not hole-specific clips.
Featured by these creators
Creator videos about this course
YouTube creators who filmed or featured The Concession Golf Club. · Stats as of Oct 12, 2026 · 6d ago
WGC Slopes: The Concession Golf Club
How did Hole 4 play?
How did this hole play today?
Frequently asked questions
Yardage reference: Championship tees · 237 yards.
What club should I use on this par 3?
↓
At 237 yards, most golfers will need a fairway wood or hybrid to reach this green. Adjust for elevation, wind, and pin position.
How difficult is hole 4?
↓
This hole is a moderate challenge for most golfers. Key challenges include: long par 3.
What hazards should I watch out for on hole 4?
↓
Key hazards include: 3 greenside bunkers. Plan your shots to avoid these trouble spots.
How big is the green on hole 4?
↓
The green is medium-sized with moderate targets. Pay attention to pin placement when selecting your approach club.
What's a good score on hole 4?
↓
This hole is a challenging par where bogey is acceptable. This longer par 3 will test your long iron or hybrid game. Par is a good score.