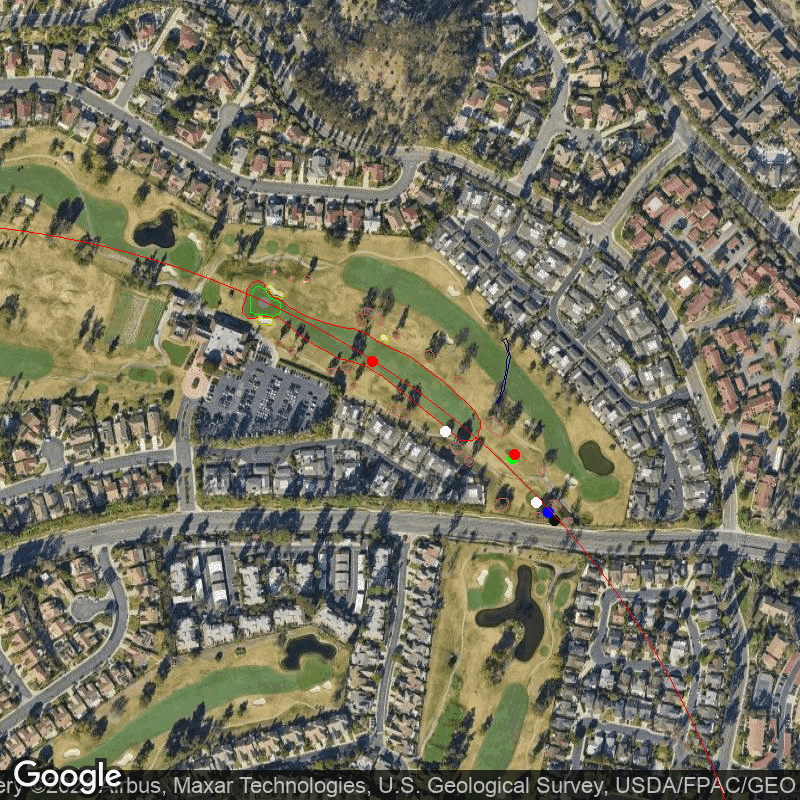
Shadowridge Golf Club Hole by Hole - 9th Hole
Shadowridge Golf Club, California
Submit a tipThere are no reviews for this hole yet
Hole 9 at Shadowridge Golf Club is a challenging par 4 that requires accuracy and strategy to score well. Located in Vista, California with an altitude of approximately 400 feet above sea level, this hole can be impacted by the local weather conditions across all four seasons.
From the championship tees, Hole 9 measures a lengthy 395 yards. With a slight dogleg left and three bunkers strategically placed along the fairway, it's important for golfers to plan their tee shot carefully. The fairway width is relatively wide at 36 yards, but any shots hit too far left or right could result in trouble.
For the average golfer hitting a driver around 217 yards off the tee, it's recommended to aim towards the center-left of the fairway to avoid potential hazards on both sides. This will leave them with an approach shot of approximately 178 yards.
The green area on Hole 9 measures at a large size of over 9600 square feet. However, only two percent of greenside bunkers are present which allows for some room for error on approach shots. The green slopes slightly from back-to-front so it's important to pay attention to pin placement when selecting clubs for your approach shot.
With an average distance of around140 yards with a seven iron and120 yards with pitching wedge for our target golfer, they should aim towards the middle or front portion of the green depending on pin placement.
As mentioned earlier, local weather conditions can impact ball flight and holes at Shadowridge Golf Club throughout each season. In general though, players may experience cooler temperatures during winter months while summer brings warmer temperatures and potentially stronger winds due its proximity near coastal areas.
Overall,Hole 9 at Shadowridge Golf Club presents itself as one that requires careful planning and precise execution from both tee shots and approaches alike in order to successfully navigate through its challenges and achieve low scores.
Teebox type:
Championship
Par:
4
Distance:
395 yards
Handicap:
3
Green Area:
9673
Approx Fairway Width:
36
Has Water:
False
Curvature:
Slight dogleg
Percent Bunkers Near green:
2
Bunker Count:
3
Bunkers:
Some fairway bunkers, with the majority (51%) strategically placed around the area.
Club Recommendations
Tip 1: Plan your tee shot carefully, aiming towards the center-left of the fairway to avoid potential hazards on both sides.
Tip 2: For an approach shot of approximately 178 yards, aim towards the middle or front portion of the green depending on pin placement.
Tip 3: Pay attention to local weather conditions and how they may impact ball flight. Cooler temperatures during winter months and warmer temperatures in summer can affect shots at Shadowridge Golf Club.
Tip 4: With a wide fairway width of 36 yards, there is some room for error off the tee. However, it's important to still aim for accuracy in order to set up a good approach shot.
Tip 5: Take note of the slight dogleg left and strategically placed bunkers along the fairway when planning your tee shot.
Tip 6: Keep in mind that only two percent of greenside bunkers are present on this hole, so there is some room for error on approach shots. However, be aware of pin placement as the green slopes slightly from back-to-front.
Tip 7: Based on average distances with certain clubs, our target golfer should aim towards specific areas on the green depending on pin placement - either middle or front portion.
Overall tip: This challenging par-4 requires careful strategy and precise execution from both tee shots and approaches alike. Plan each shot carefully based on course layout and local weather conditions in order to successfully navigate through its challenges and achieve low scores.
"The most important shot in golf is the next one."
- Ben Hogan
Only signed in users can add reviews.
Sign inThere are no reviews for this hole yet