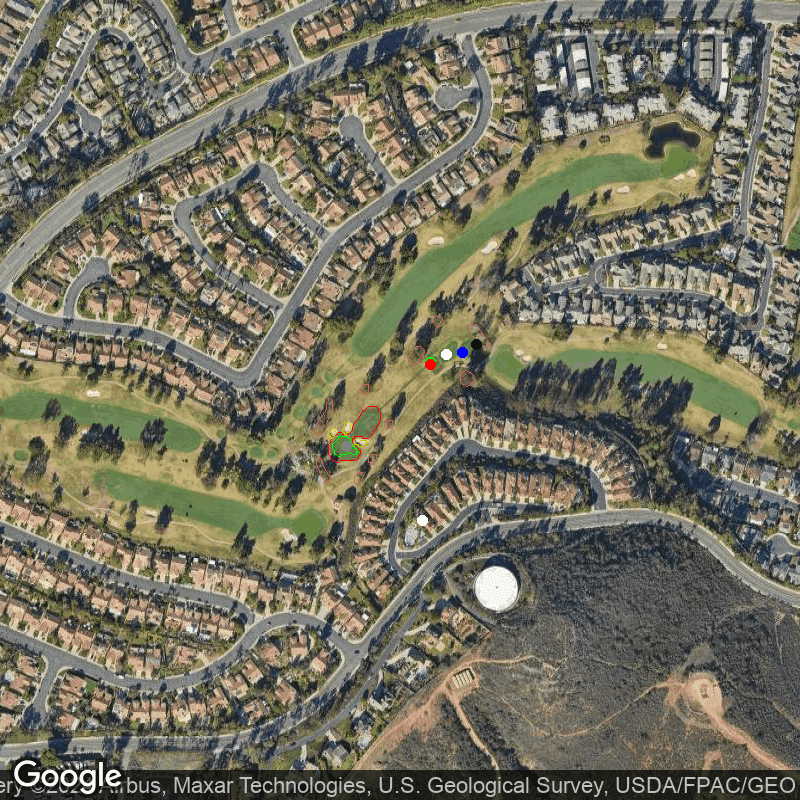
Shadowridge Golf Club Hole by Hole - 4th Hole
Shadowridge Golf Club, California
Submit a tipThere are no reviews for this hole yet
Hole 4 at Shadowridge Golf Club is a challenging par-3 that requires precision and strategy to score well. Located in Vista, California, this hole measures 182 yards from the Championship tees and has a handicap of 11.
The tee shot on this hole will require a long iron or hybrid for most golfers, as the average distance off the tee is around 217 yards. The green is protected by three bunkers strategically placed along both sides of the fairway. These greenside bunkers make up only 6% of the total area but can cause trouble for any errant shots.
As you approach your tee shot, take into consideration how altitude and wind may affect your ball flight conditions. Being located in Southern California, Shadowridge Golf Club experiences warm weather throughout most of the year with occasional gusts of wind that can impact club selection and ball trajectory.
For an optimal approach to this hole, it's recommended to aim towards the center-left side of the green as there are fewer hazards on that side. Depending on pin placement and personal preference, using a pitching wedge (~120 yards) or a short iron such as a 9-iron (~140 yards) or even an 8-iron (~150 yards) could be effective choices off the tee.
Once you've safely navigated your way onto the green, you'll find yourself facing one of Shadowridge's smaller putting surfaces measuring approximately 5,066 square feet. With no water hazards present on this hole, focus instead on avoiding those pesky greenside bunkers when planning out your putt.
Overall Hole 4 at Shadowridge Golf Club presents golfers with an exciting challenge that rewards strategic thinking and accurate execution. Keep these tips in mind during each season's varying weather conditions to maximize your chances for success on this demanding par-3.
Teebox type:
Championship
Par:
3
Distance:
182 yards
Handicap:
11
Green Area:
5066
Approx Fairway Width:
Has Water:
False
Curvature:
Percent Bunkers Near green:
6
Bunker Count:
3
Bunkers:
Some fairway bunkers, with the majority (51%) strategically placed around the area.
Club Recommendations
1. Use a long iron or hybrid off the tee to ensure accuracy and distance control.
2. Aim towards the center-left side of the green to avoid greenside bunkers.
3. Take into account altitude and wind when selecting your club for the tee shot.
4. Consider using a pitching wedge, 9-iron, or 8-iron depending on personal preference and pin placement.
5. Focus on avoiding greenside bunkers when planning out your putt on the smaller putting surface.
6. Keep in mind that warm weather and occasional gusts of wind can impact club selection and ball trajectory throughout most of the year at Shadowridge Golf Club.
7. Remember that this hole requires precision and strategy, so take time to plan out each shot carefully before executing it.
8. Don't be afraid to play conservatively if necessary - errant shots can easily find trouble with strategically placed bunkers along both sides of the fairway.
9. Practice hitting from different lies (uphill, downhill, etc.) as this hole may present varying terrain conditions that could affect your approach shot.
10. Lastly, trust in your abilities but also stay mentally focused throughout this challenging par-3 hole at Shadowridge Golf Club.
"The most important shot in golf is the next one."
- Ben Hogan
Only signed in users can add reviews.
Sign inThere are no reviews for this hole yet