Hole 1 at Shoal Creek Golf Club
- Par
- 4
- Yardage
- 405 yds
- Stroke index
- 9
- Hazards
- 5 bunkers
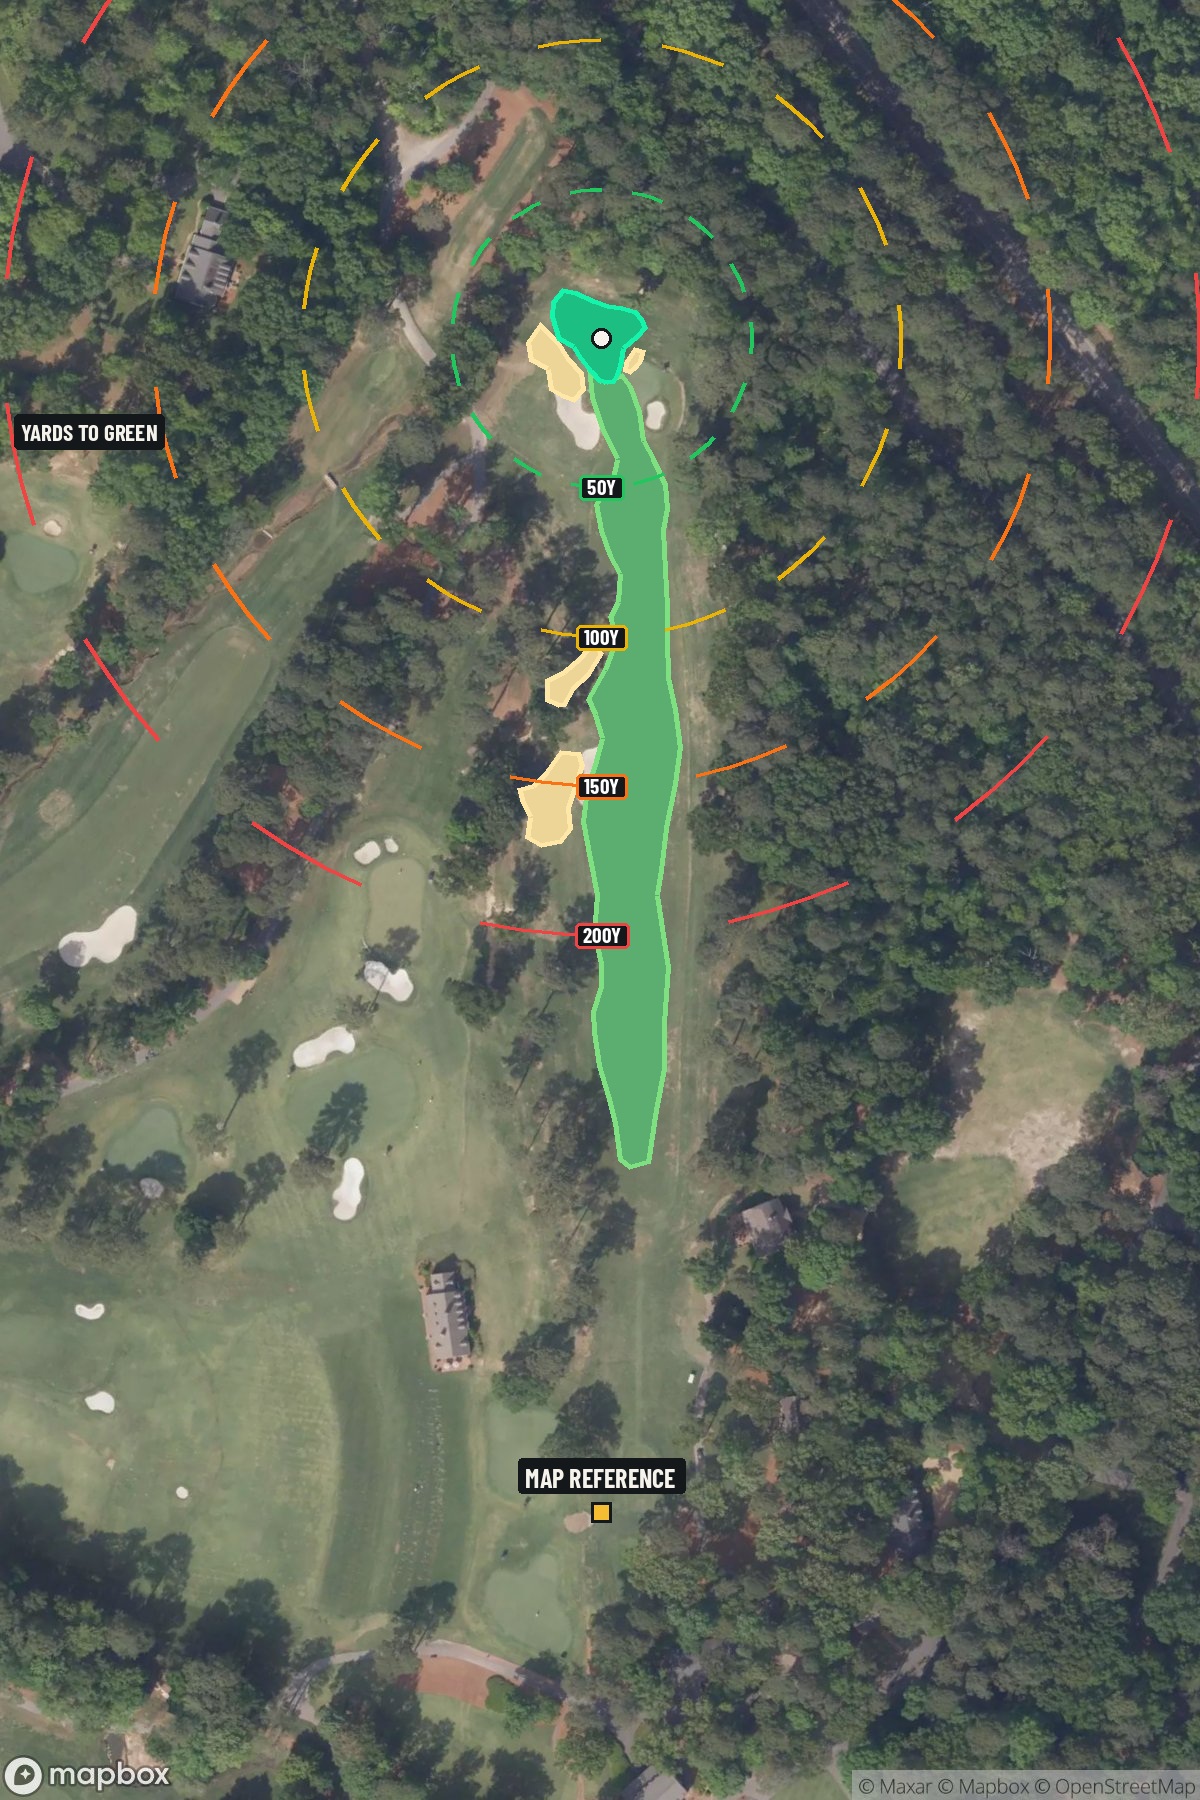 Hole 1 map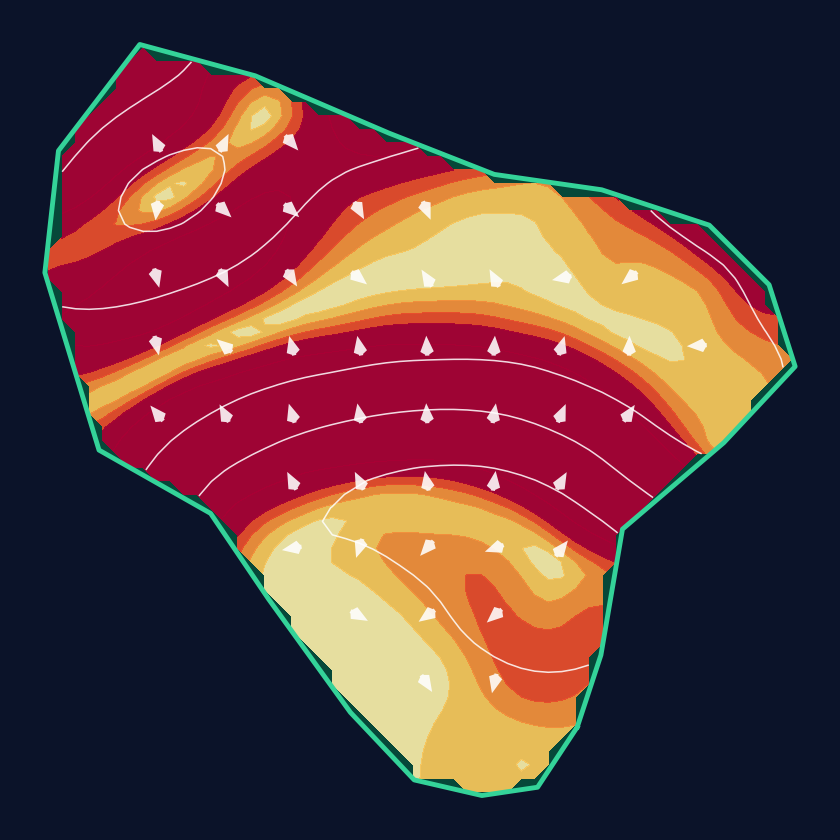
32 yd wide × 32 yd deep · 3.6 ft total elevation range
Light = gentler slope · Red = steeper slope
White lines: 1 foot of elevation. Arrows: downhill. General terrain, not a pin read.
Approach from bottom
Contour source
USGS one meter x53y370 AL 25Co B2 2017 · collection 2017
Map source & reference
Mapbox Satellite composite · capture date not provided. Green at the top; the labeled map reference is below.
Scorecard yardage is for Championship tees. The aerial shows its labeled reference position; distance rings measure to the green.
Championship tees · Par 4 · 405 yards
The plan for No. 1
The opening hole at Shoal Creek Golf Club sets an inviting yet strategic tone for one of Alabama's most prestigious championship venues. This straight par 4 stretches 395 yards through tree-lined fairways that demand accuracy from the opening tee shot. The generous landing area rewards confident drives, but the real test lies in the approach to a small, well-protected green complex. With minimal hazards cluttering the playing corridor, golfers can focus on course management and precise iron play. The compact putting surface requires thoughtful club selection and careful distance control, as even slight misses can leave challenging recovery shots. This classic opener perfectly embodies Shoal Creek's philosophy of strategic golf design, where precision trumps power and smart play is rewarded throughout the round.
Off the tee
The opening tee shot calls for finding the optimal position in the landing zone, typically around 250 yards out for most golfers. Driver remains the preferred choice for longer hitters who can comfortably reach the ideal approach distance, while shorter hitters might consider a fairway wood or hybrid to ensure solid contact and good positioning. Focus on the center-left portion of the fairway to open up the best angle to the small green. The key here is committing to your swing and avoiding the tentative first-tee jitters that can lead to pushed or pulled drives.
Approach & recovery
Your approach strategy centers entirely around the small green, which demands pinpoint accuracy over power. From the ideal driving position, you'll likely face a short to mid-iron shot that requires precise distance control. The compact target means club selection becomes critical—always take enough club to reach the back of the green and focus on a smooth, controlled swing. Pin position will dictate your target area, but when in doubt, aim for the center of the green and let your putting take care of the rest.
On the green
The small putting surface creates both opportunities and challenges. While shorter putts are common from good approach shots, the limited real estate means precision becomes paramount. Study the green's subtle breaks carefully, as even minor slopes become magnified on a compact surface. Focus on speed control above all else—a putt that rolls off this small green can quickly turn a scoring opportunity into a bogey. ## RISK VS REWARD This hole offers an excellent scoring opportunity without significant penalty for aggressive play. The primary risk-reward decision comes with approach club selection: taking less club for a softer landing versus ensuring you clear any front-edge trouble. With no major hazards to penalize wayward shots, you can play aggressively while maintaining confidence in your recovery options. ## DIFFERENT SKILL LEVELS **Low-handicap players** should view this as a birdie opportunity, using driver off the tee and attacking pins with confidence. Focus on dialing in your approach yardages and being aggressive with putts inside 12 feet. **High-handicap players** benefit from a more conservative approach: consider hitting 3-wood or hybrid off the tee for better accuracy, then focus on hitting the center of the green regardless of pin position. Two-putting for par represents an excellent start to your round and builds momentum for the holes ahead.
Hole 1 Green Complex & Slope
USGS 3DEP terrain analysis
Green size: 4,460 sq ft
How did Hole 1 play?
How did this hole play today?
Frequently asked questions
Yardage reference: Championship tees · 405 yards.
What's the best strategy off the tee?
↓
For this 395-yard par 4, most players will hit driver to set up a comfortable approach.
How difficult is hole 1?
↓
This hole is a good scoring opportunity for most golfers. Key challenges include: small green.
How big is the green on hole 1?
↓
The green is small and requires precision. Expect challenging pin positions with limited room for error.
What's a good score on hole 1?
↓
This hole is a medium-length test where par is a solid result. A straightforward par 4 where course management pays off.